1. To create a new Categories Menu go to:

This tutorial demonstrates how to create a custom menu in WordPress and how to create a menu structure.:
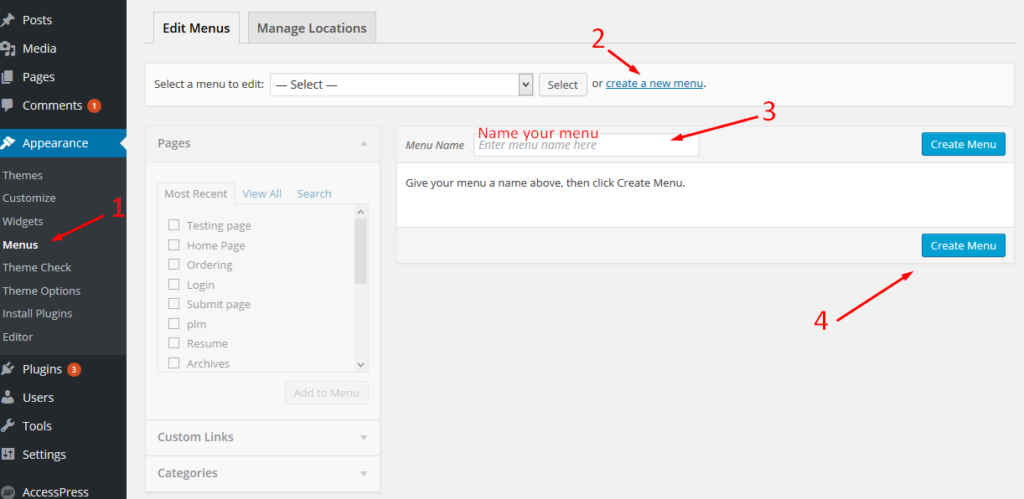
- Go to your WordPress Dashboard > Appearance > Menus
- Click on the “create a new menu” link.
- Write a name for you menu.
- Press Create Menu button.
2. To customize your new Menu:
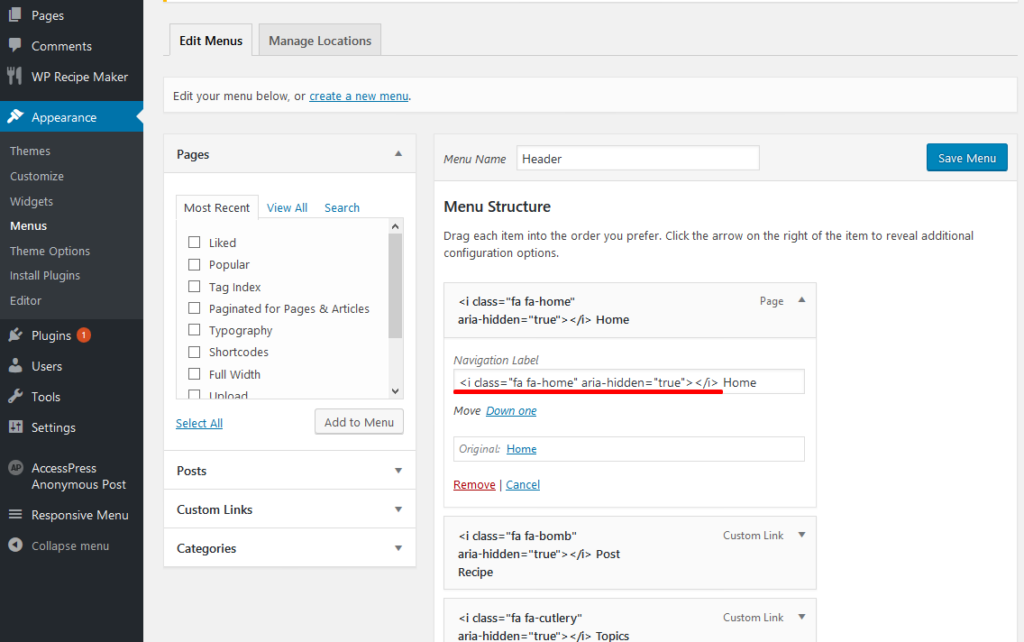
- Start to add menu items from the left panels (Homepages, Pages, Links, Categories).
- You can manage your menus by using the drag and drop functionality and rearrange the menu items in the desired order.
After setting up your menu, scroll down to the bottom of the page and assign the menu to the “Categories Navigation” Theme Locations at the bottom. Select Categories Navigation.
3. Add Icons to your new Menu:
- To add a font ICON: select a menu that you want to edit and paste the icon code in a menu item, then save the menu. To preview all available Font Awesome icons go to http://fortawesome.github.io/Font-Awesome/icons/.

- Now, edit your menu and just paste the code you’ve copied:
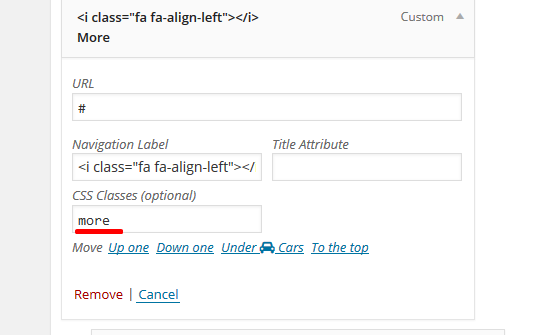
4. Colored “More” custom link
To add a color to the menu like this:

- Go to the right corner at the top and click “Screen Options” and check CSS Classes, like this:

- Now, open the custom menu you’ve created and add the class “more” to CSS Classes, like this: