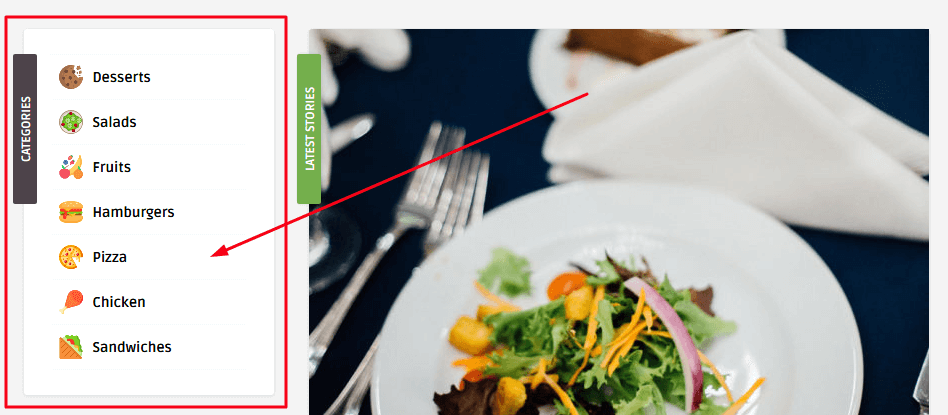
1. To create a new a Category Menu go to:
This tutorial demonstrates how to create a custom menu in WordPress and how to create a menu structure.:
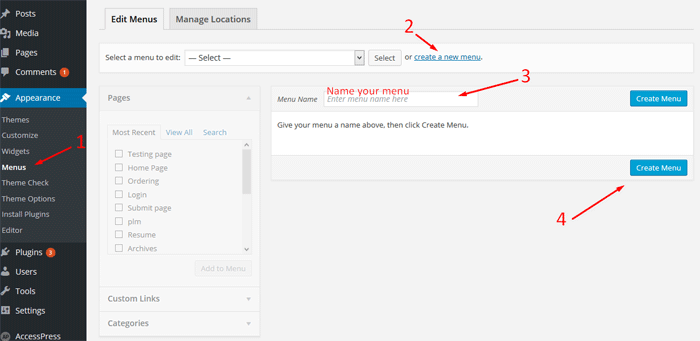
- Go to your WordPress Dashboard > Appearance > Menus
- Click on the “create a new menu” link.
- Write a name for your menu.
- Press Create Menu button.
2. To customize your new Categories Menu:
- Start to add menu items from the left panels (Homepages, Pages, Links, Categories).
- You can manage your menus by using the drag and drop functionality and rearrange the menu items in the desired order.
After setting up your menu, scroll down to the bottom of the page and assign the menu to one of the 2 Theme Locations at the bottom. Select Categories Navigation same thing you see in the photos below: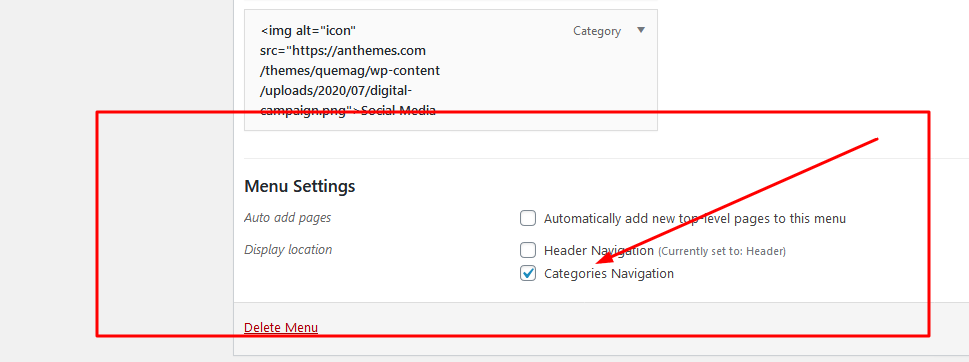
3. Add Icons (images) to your new Menu:
The below steps are from the Quemag theme, but there are the same steps you need to follow, the only thing different are the icons you need to add, in this case, food icons.
The food icons used can be found here https://www.flaticon.com/search?word=food&style_id=8 you have literally hundreds of icons to use. Once you want to use an icon click the icon and select 64px .png format.

- Go to WordPress > Media and add your new icon image you’ve downloaded.
- Click the icon and copy the icon link

- In order to make use of the image, we need to use HTML images Syntax, like this:
<img src="here you add the icon link" alt="myicon">
And with the icon link copied from WordPress > Media, your syntax will look like this:
<img src="https://anthemes.com/themes/quemag/wp-content/uploads/2020/07/maps-and-flags.png" alt="myicon">
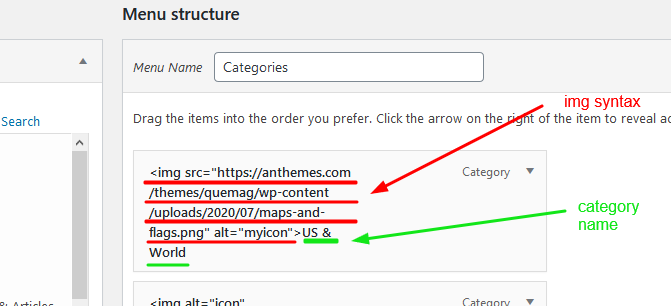
- Now go to the Categories Menu you’ve created earlier via WordPress Dashboard > Appearance > Menus and you’ll see this:
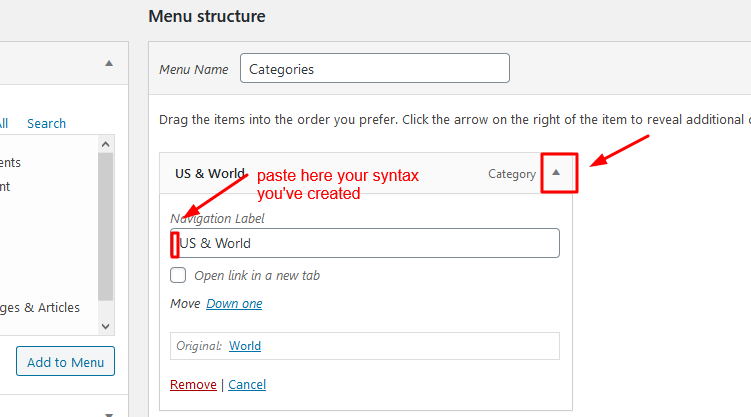
- Copy the syntax from the point (3) and add it before your category name, like this
<img src="https://anthemes.com/themes/quemag/wp-content/uploads/2020/07/maps-and-flags.png" alt="myicon">US & World
- And will look like this and you’ll need to make the same thing for all your categories in case you want to add your icons, otherwise, you’ll need to create only the Category menu.
