Your FoodMagi WordPress Theme
FoodMagi / template documentation version 1.0
Item Details
- Item Name : FoodMagi
- Minumum Required : WordPress Version 6+
- Author by : An-themes
- Demo url : https://anthemes.com/themes/foodmagi/
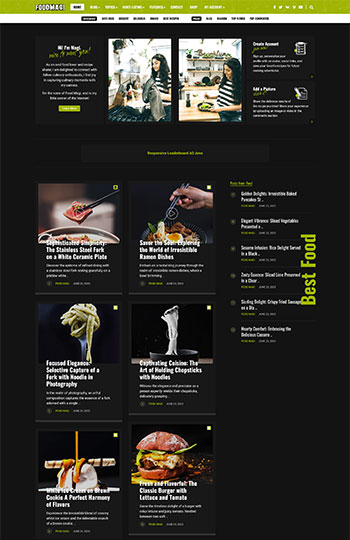
Introducing "FoodMagi" – a captivating WordPress theme designed exclusively for food enthusiasts and recipe aficionados. With its engaging features and interactive community-focused design, FoodMagi takes your culinary journey to new heights, providing an immersive platform for users to explore, share, and connect. FoodMagi offers a seamless experience for both authors and users. Authors can effortlessly showcase their culinary creations by adding mouthwatering recipes, accompanied by tantalizing images and videos. This ensures that every recipe comes to life on the screen, inspiring visitors to delve into the world of flavors.
Support requests are being processed on business days Monday to Friday from 8:00 to 17:00 (GMT +2) within 24h in the order they were received:
Submit a support ticket My Portfolio
Getting Started #back to top
Need Help?
Please Note: This support is for Theme Set-Up, Theme Usage & Bug Reports Only, I do not offer support for making or helping with, customisations to my theme’s code. If you have modified your theme code then please ensure it is not your modifications causing any issues with the theme. We cannot provide support on 3rd party plugins, and all 3rd party plugins should be disabled before contacting us for support.
Support for my items includes:
- 1. Responding to questions or problems regarding the item and its features
- 2. Fixing bugs and reported issues
- 3. Providing updates to ensure compatibility with new software versions
Item support does not include:
- 1. Theme Customization and installation services
- 2. Support for third party software and plug-ins
- 3. Support for 3rd party plugins and issues that may have arisen after activating this 3rd party plugin
- 4. WordPress General Support. Use the WP.org forums for general WordPress support.
- 5. Support for issues caused by user modifications in the theme’s code, styling and general function by yourselves or your developer
How to Install WordPress #back to top
To install the theme you will need to download your purchase from Themeforest. Login to your Envato account, navigate to your downloads and find the theme. Click on the download link.
Download The Theme
1. Select the “All Files & Download” option to download the theme file and the sample data (the main theme file zip will be located inside the Upload folder).
2. Select the “Installable WordPress File Only” if you just want the theme.
How to Install Theme #back to top
Installing Via WordPress
- Login to WordPress Browse to Appearance > Themes
- Click Add New
- Click the Upload link
- Click Browse
- Select the zipped theme file to upload (the zip file is in the Upload folder if you chose to download all files) and click Install.
- Now Activate the theme
Upload Via FTP Server
- Login to your site via FTP
- Browse to your folder located at wp-content/themes
- Upload the main theme folder (the folder is located in the Upload folder if you chose to download all files)
- Login to WordPress
- Browse to Appearance > Themes
- Find and activate the theme
One Click Demo Import (Demo Content) #back to top
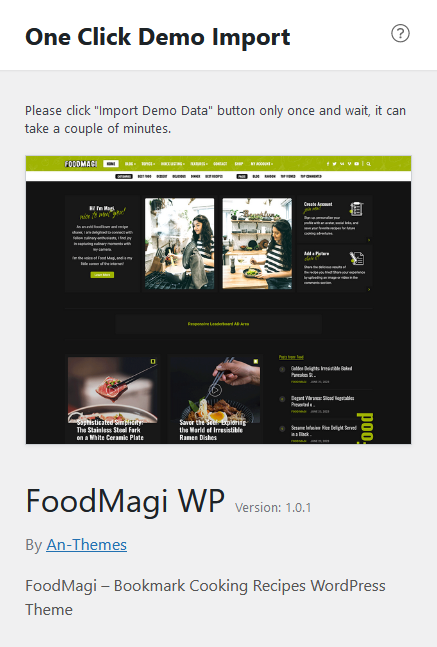
One Click Demo Import
After installing the theme you should be prompted to install and activate the included plugins. Make sure you've installed / activated the plugin "One Click Demo Import". After the installation of the plugin:
- Go to Appearance > Import Demo Data
- Add your ThemeForest Purchase Code, can be found via your download page: https://themeforest.net/downloads
- Select one of the demos and click "Import".
- Please click "Import" button only once and wait, it can take a couple of minutes, FoodMagi demo it will take 3-5 minuts as it will download high-resolution images, so please, have patience as it will depend on your server power.
- After you imported the demo, save your menu in order to be displayed. Go to Appearance > Menus.
- After setting up your menu, scroll down to the bottom of the page and assign the menu to the "Header Navigation" Theme Locations at the bottom.
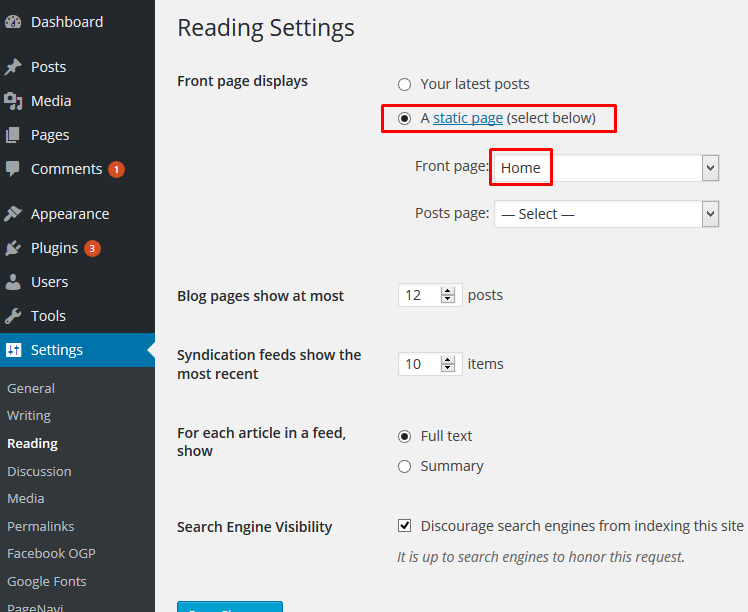
- Go to Dashboard > Settings > Reading and from "Your homepage displays" select "A static page (select below) and select "Home" for (Homepage) and "Blog" for the (Post page) and add the number of posts you want to display via "Blog pages show at most", default is 8.
- After that, please follow the Documentation for plugins configuration.
Install Plugins #back to top
After installing the theme you should be prompted to install and activate the included plugins. A yellow Recommended Plugins notice should be visible at the top of your screen. Installation and activation is optional but recommended since each plugin adds an additional layer of functionality to the theme.

#1. FoodMagi Theme Core
Theme Functionality: Custom Style, Theme core, Post Views etc.
#2. FoodMagi Demo Import
Import your demo content, widgets and theme settings with one click.
#3. Simple GDPR Cookie Compliance
Simple GDPR Cookie Compliance is a simple notifier to inform users that your site uses of cookies and show your complies with EU GDPR cookie law and CCPA regulations.
#4. Multi-column Tag Map
This makes it easier for your visitors to quickly search for topics that might intrest them. It’s a great alternative to the tag cloud. Displays a columnized and alphabetical (English) listing of all tags, categories, authors.
#5. MailChimp for WordPress
Allowing your visitors to subscribe to your newsletter should be easy. With this plugin, it finally is.
#6. Contact Form 7
Contact Form 7 can manage multiple contact forms, plus you can customize the form and the mail contents flexibly with simple markup. The form supports Ajax-powered submitting, CAPTCHA, Akismet spam filtering and so on.
#7. WooCommerce
Whether you’re launching a business, taking brick-and-mortar retail online, or developing sites for clients, use WooCommerce for a store that powerfully blends content and commerce.
#8. WP Recipe Maker
WP Recipe Maker is the easy recipe plugin that everyone can use. An easy workflow allows you to add recipes to any post or page with automatic JSON-LD metadata for your recipes. This metadata will improve your SEO and get you more visitors!
#9. AJAX Login and Registration
Easy to integrate modal with Login and Registration features + inline form using shortcode. Compatible with any theme.
#10. Nav Menu Roles
This plugin lets you hide custom menu items based on user roles. So if you have a link in the menu that you only want to show to logged in users, certain types of users, or even only to logged out users, this plugin is for you.
#11. Basic User Avatars
Add an avatar upload field on frontend pages and Edit Profile screen so users can add a custom profile picture.
#12. DCO Comment Attachment
DCO Comment Attachment allows your visitors to attach images, videos, audios, documents and other files with their comments. They will also be able to automatically embed links from Youtube, Facebook, Twitter and other services in the comment text.
Home Page Settings #back to top
Homepage – How to build and set it
You can use Gutenberg or Classic Editor (you'll need to install the Classic Editor plugin).
By default WordPress sets the blog page as a main page and this is not what most of us want, we need custom pages. To change WordPress default settings you have to:
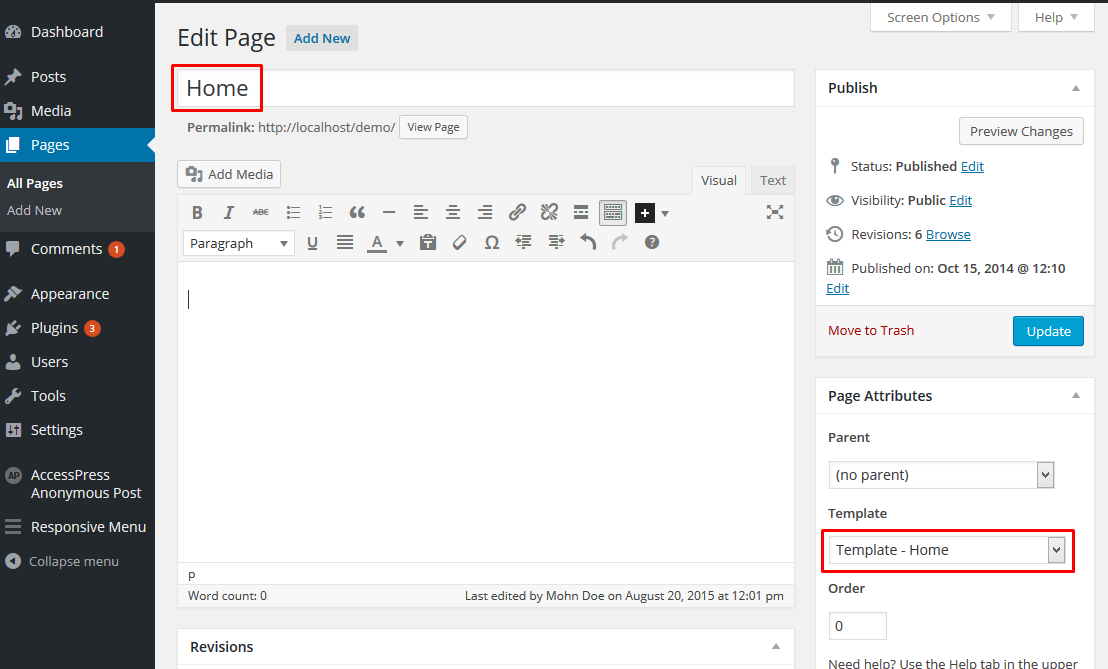
- Go to Dashboard > Pages > Add New:
- Name it Home or whatever and from the right on Page Attributes choose "Template - Home (Grid)".
- Now go to Dashboard > Settings > Reading and from "Front page displays" select "A static page (select below) and select the page you've created a few seconds ago.
1. Create a new page, go to Pages > Add New
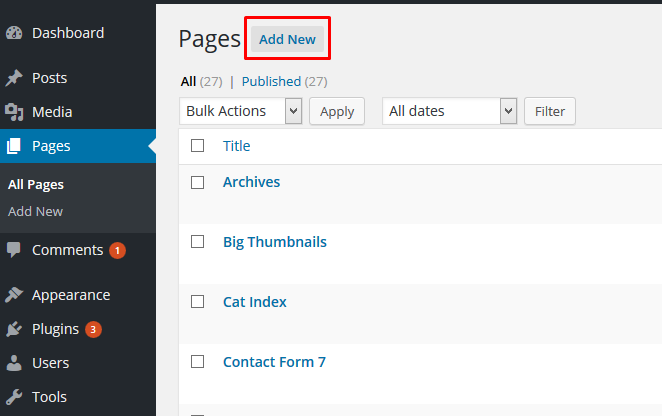
2. Set the page title and select a page template.
3. Go to Settings > Reading and set the newly created page as a homepage.
From "Blog pages show at most" you can add how many posts you want to display via the homepage, by default it will be 8 / posts.
4. Recent / Top Commented / Top Viewed / Random
In order to display all those pages, we need to create them. Same steps as the Homepage, the steps above.
RecentIs the Home page you've created, so you can name it however you want.
Home Grid:- Go to Dashboard > Pages > Add New:
- Name it "Grid" and from the right on Page Attributes choose "Template - Home (Grid)".
- Go to Dashboard > Pages > Add New:
- Name it "Modules" and from the right on Page Attributes choose "Template - Home (Full Width Modules)".
- Go to Dashboard > Pages > Add New:
- Name it "Top Commented" and from the right on Page Attributes choose "Template - Home (Top Commented)".
- Go to Dashboard > Pages > Add New:
- Name it "Top Viewed" and from the right on Page Attributes choose "Template - Home (Top Viewed)".
- Go to Dashboard > Pages > Add New:
- Name it "Random" and from the right on Page Attributes choose "Template - Home (Random Posts)".
Home Modules #back to top
Home Modules
If you already created your Homepage, now it is time to add your modules.
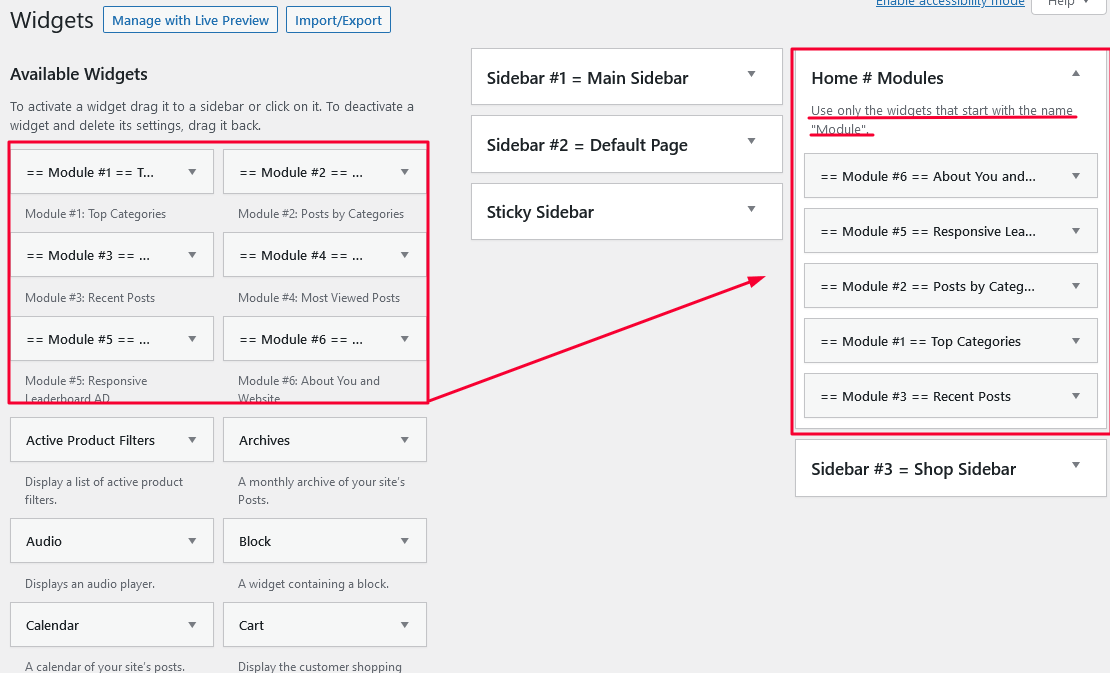
What are Widget Modules? These are simple or complex custom widgets, that you can arrange by drag and drop via Appearance > Widgets or via Customize > Widgets. The easy way to use them is by using the "Classic Widgets" plugin offered by WordPress, which can be downloaded from here https://wordpress.org/plugins/classic-widgets/, the theme already recommended it, so it should be installed by default if you installed all plugins that come with the theme.
- Activate "Classic Widgets" plugin.
- Go to Appearance > Widgets or via Customize > Widgets.
- Drag and drop the custom widget with the name "Module" to the "Home # Modules" box, as per the screenshot:
- Or go to Customize > Widgets:
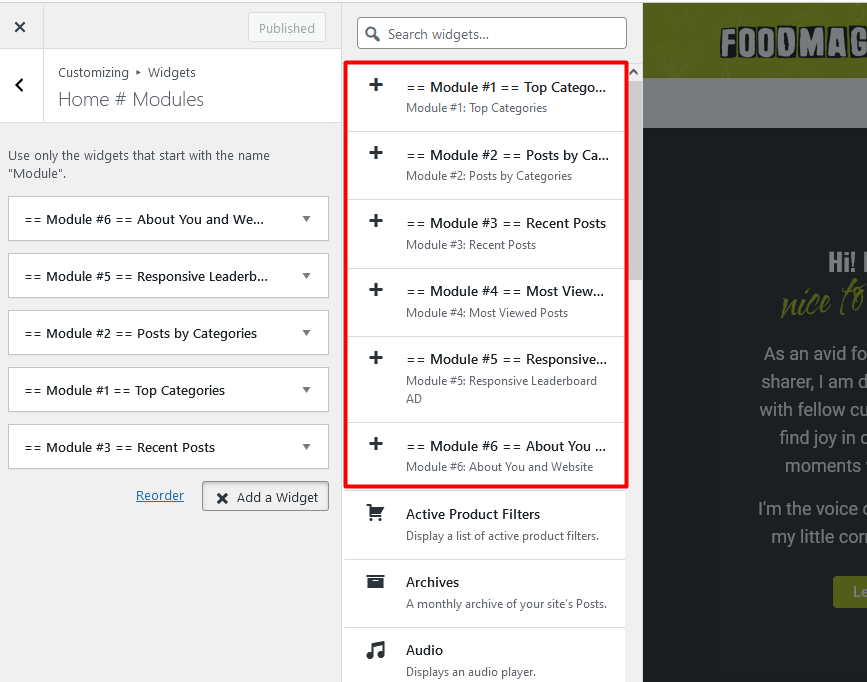
- And that's it.

Header Menu Settings #back to top
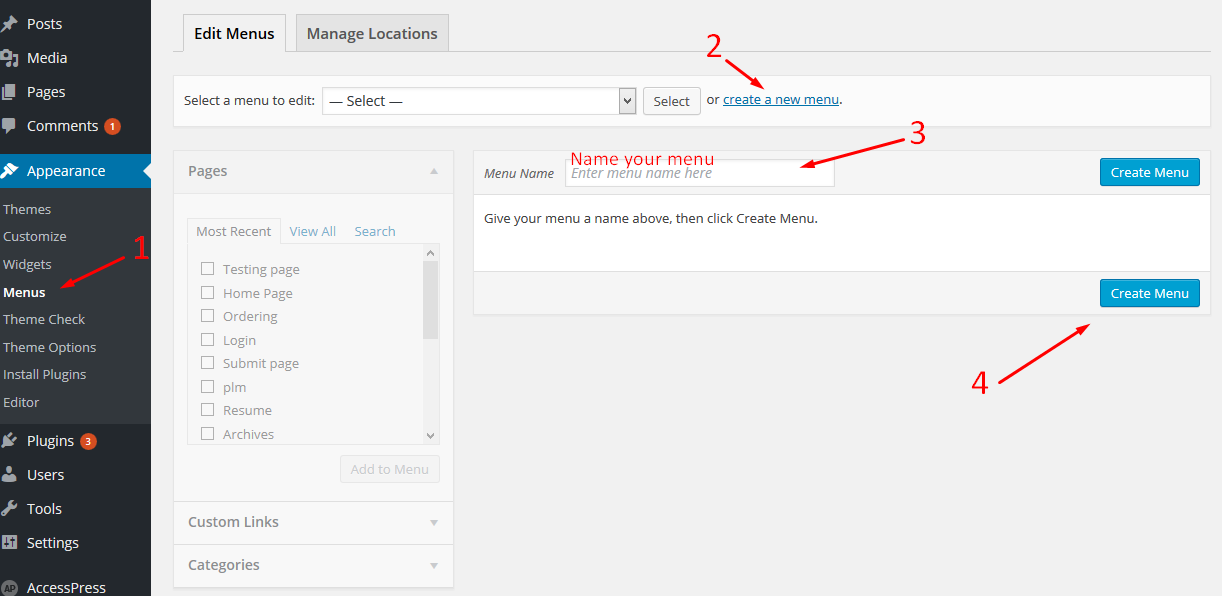
1. To create a new Main Menu go to:

This tutorial demonstrates how to create a custom menu in WordPress and how to create a menu structure.:
- Go to your WordPress Dashboard > Appearance > Menus
- Click on the "create a new menu" link.
- Write a name for you menu.
- Press Create Menu button.
2. To customize your new Menu:
- Start to add menu items from the left panels (Homepages, Pages, Links, Categories).
- You can manage your menus by using the drag and drop functionality and rearrange the menu items in the desired order.
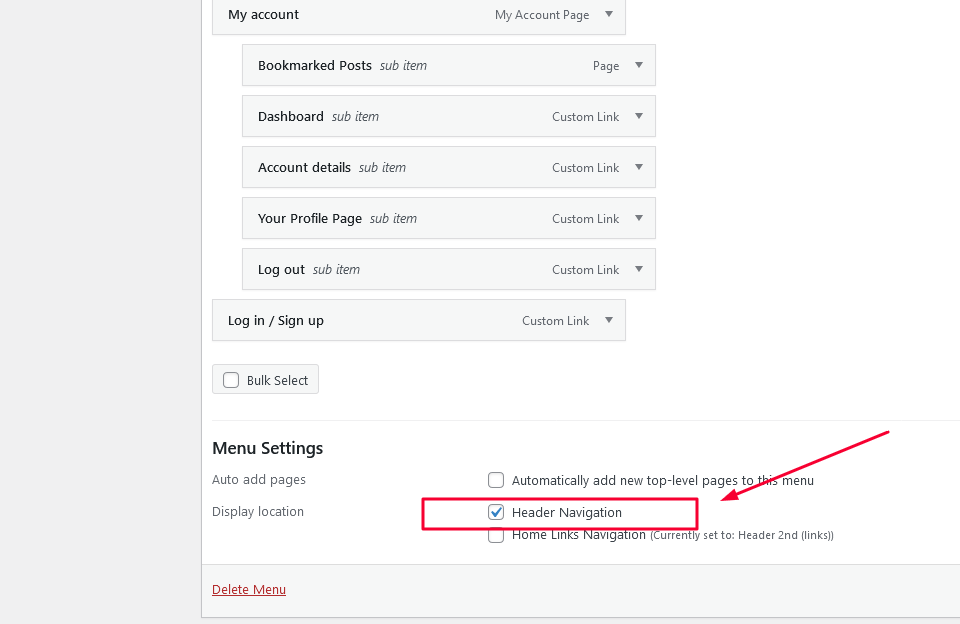
After setting up your menu, scroll down to the bottom of the page and assign the menu to the "Header Navigation" Theme Locations at the bottom. Select Header Navigation same thing you see in the photo from the below. - Click the Save Menu button.
3. Create 2nd menu:

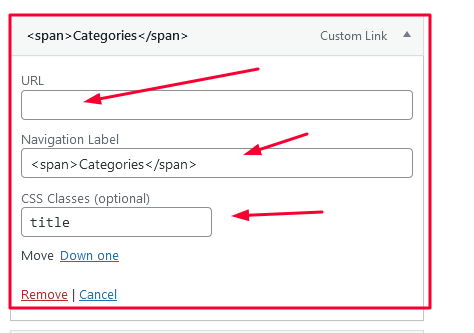
- Create "Categories" Link: create a custom link as per the screenshot:

- At the top, in the right corner, you have a button "Screen Options" click it and check "CSS Classes". Now change the "Categories" link you've created like as per the screenshot: delete the # and add "title" for the CSS classes, and don't forget to add <span></span> for the Categories labed:
- Now add some categories, as per the demo.
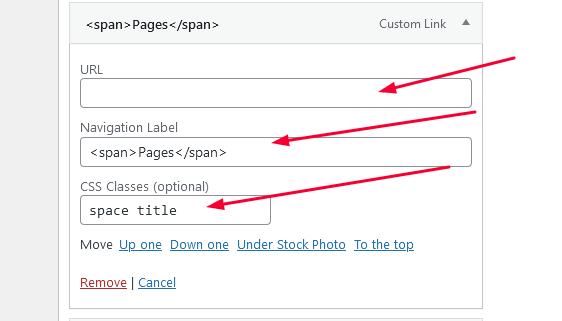
- Create "Pages" link, the same way you've created the "Categories" link. For the pages link in the CSS Classes field add "space title" as per the screenshot:
- Now add the pages you've created like: Random, Top Viewed, Top Commented, etc.
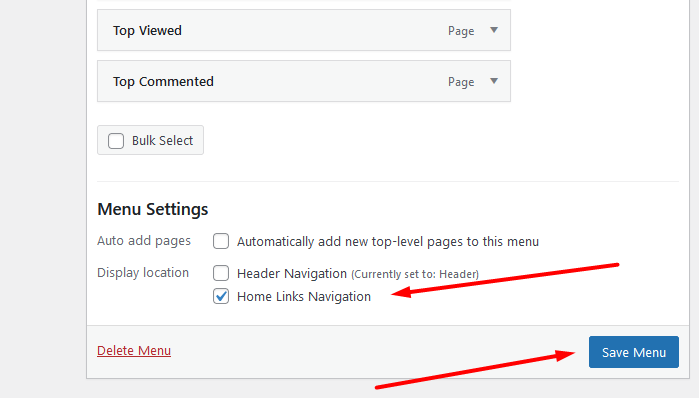
- After setting up your menu, scroll down to the bottom of the page and assign the menu to the "Home Links Navigation" Theme Locations at the bottom, as per the screenshot and Click the Save Menu button:
Regenerate Thumbnails #back to top
Thumbnails – Fix strange looking images on blocks
This problem appears when you install the theme on a site which already has content. The theme comes with it’s own thumbnails to minimize the page size and increase the page loading speed.:
- Install and activate the Thumbnail Regenerate plugin from here: https://wordpress.org/plugins/regenerate-thumbnails/
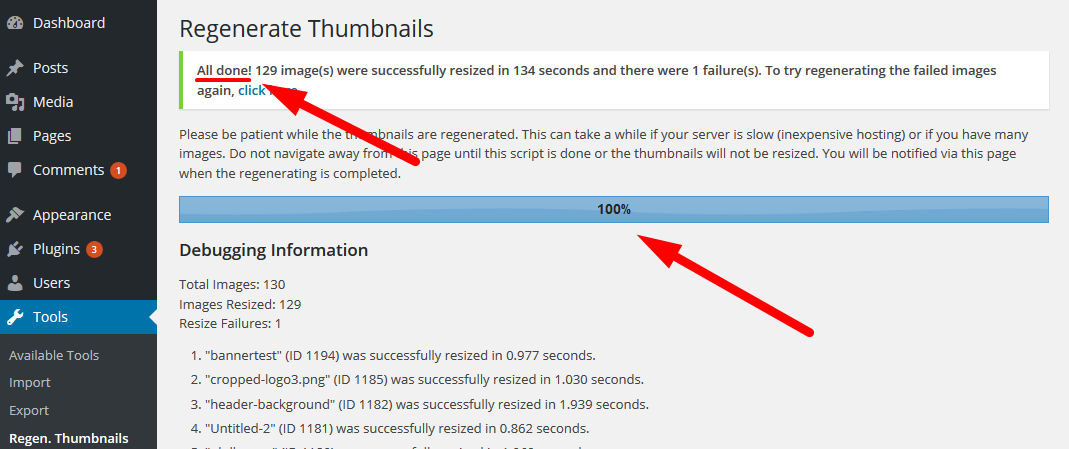
- Go to Tools -> Regen. Thumbnails and press the “Regenerate All Thumbnails” button:
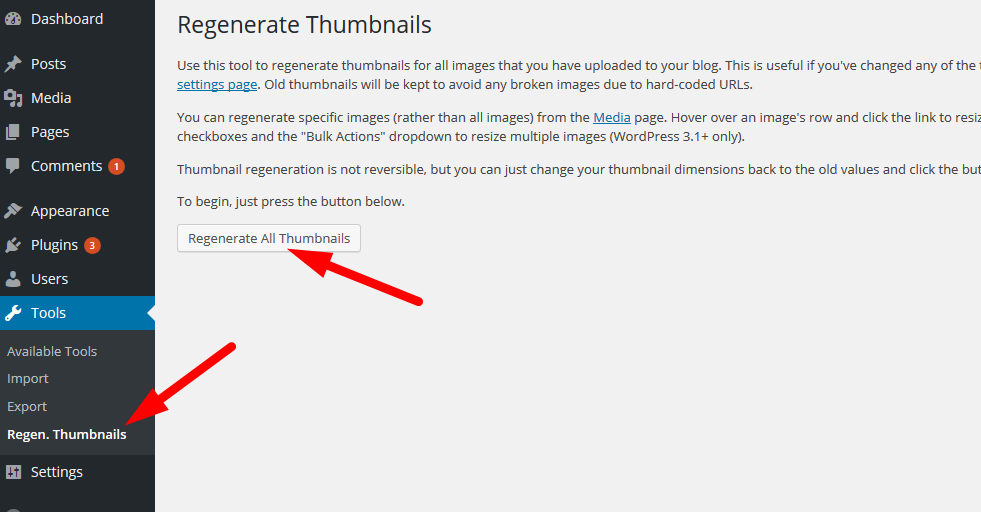
- Wait until the regeneration process is 100% done and check the page (your website). Refresh the browser page to see the changes, and that's it.
MailChimp Settings #back to top
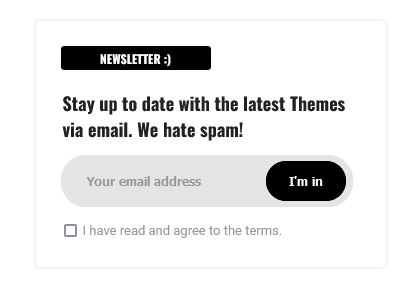
MailChimp Configuration
This plugin helps you grow your MailChimp lists and write better newsletters through various methods. You can create good looking opt-in forms or integrate with any existing form on your site, like your comment, contact or checkout form.
- Install the plugin and activate it.
- Go to Dashboard > MailChimp > Form and paste this:
<div class="subscribe-widget">
<h3>Stay up to date with the latest Themes via email. We hate spam!</h3>
  <input type="email" name="EMAIL" placeholder="Your email address" required />
  <input type="submit" value="I'm in" />
  <p><input name="AGREE_TO_TERMS" type="checkbox" value="1" required=""><span>I have read and agree to the terms.</span></p>
</div>
- Now go to Appearance > Widgets and drag the widget "MailChimp Sing-up Form" to the custom siderbar you want to use.
- You can add your MailChimp API via Dashboard > MailChimp > MailChimp, after you've added your API key, click "Save Changes".
Contact Form 7 Settings #back to top
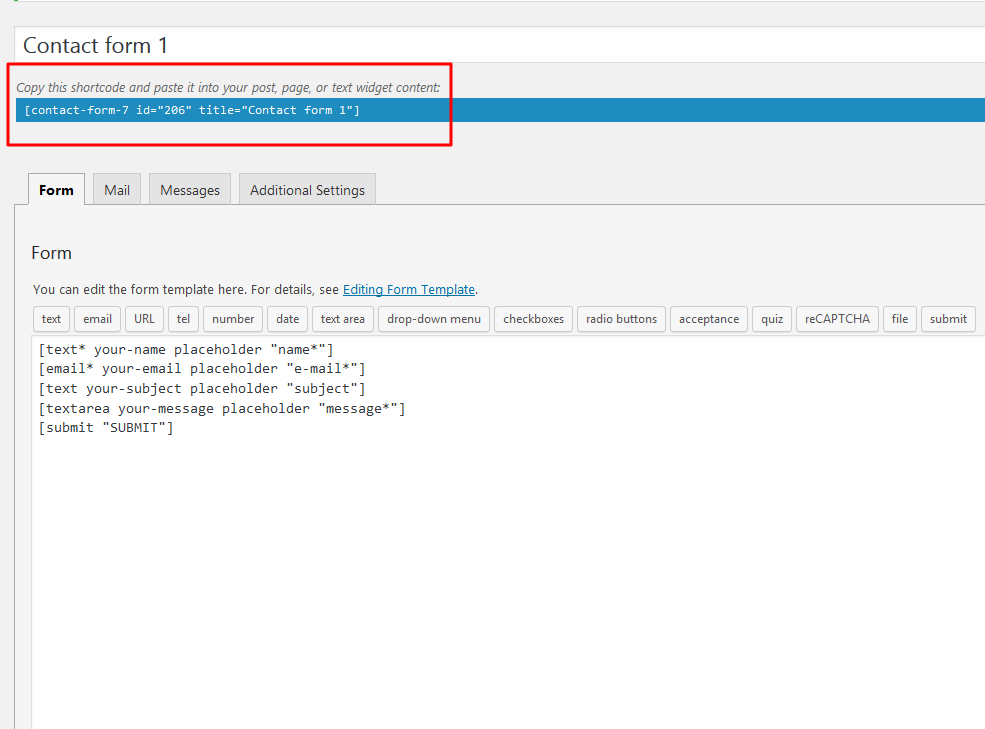
Contact Form 7 Configuration
Contact Form 7 can manage multiple contact forms, plus you can customize the form and the mail contents flexibly with simple markup. The form supports Ajax-powered submitting, CAPTCHA, Akismet spam filtering and so on:
- Install and activate the Contact Form 7 plugin from here Contact form 7.
- Navigate to Dashboard > Contact and click Edit your first contact form.
- Copy / paste this code:
[text* your-name placeholder "name*"]
[email* your-email placeholder "e-mail*"]
[text your-subject placeholder "subject"]
[textarea your-message]
[submit "Get in Touch"]
- Now, copy the shortcode and paste it into your contact page:
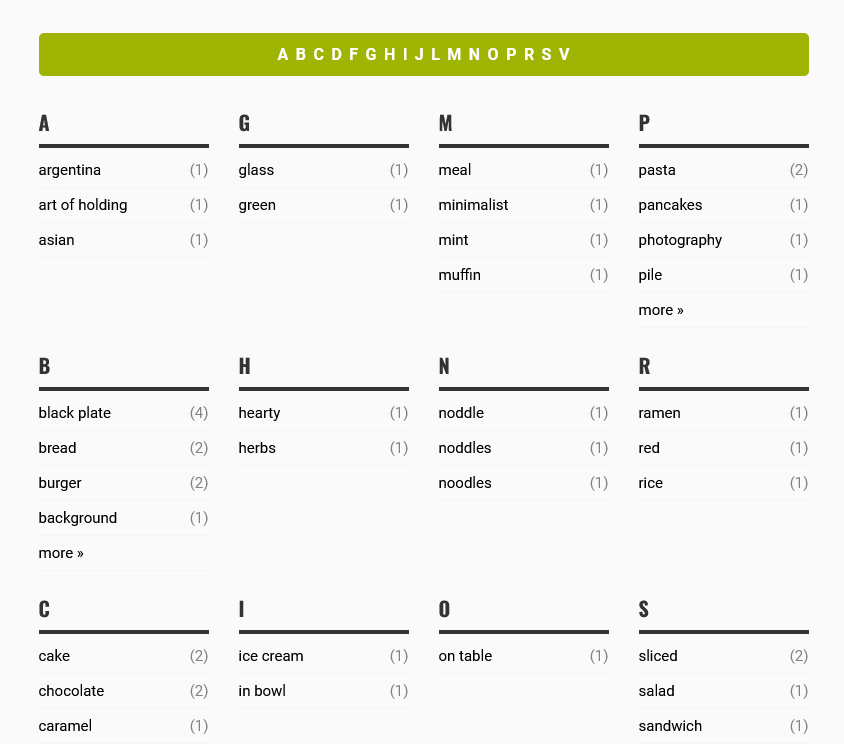
ABC Tags, Cats and Users Index #back to top
First, you’ll need to install the plugin “Multi-column Tag Map“"
Tag Index
Create a page from Dashboard > Pages > Add New and paste this code:
[mctagmap columns="4" show_navigation="yes" hide="yes" num_show="4" more="more »" toggle="« less" show_empty="yes" name_divider="|" count_order="DESC" tag_count="yes" exclude="2009, exposition" descriptions="no" equal="yes" manual="" basic ="no" basic_heading="no" show_categories="no"]
Categories Index
Create a page from Dashboard > Pages > Add New and paste this code:
[mctagmap columns="4" show_navigation="yes" hide="yes" num_show="4" more="more »" toggle="« less" show_empty="yes" name_divider="|" tag_count="yes" count_order="DESC" exclude="2009, exposition" descriptions="no" equal="yes" manual="" basic ="no" basic_heading="no" show_categories="yes"]
Users Index
Create a page from Dashboard > Pages > Add New and paste this code:
[mctagmap columns="4" show_navigation="yes" hide="yes" num_show="4" show_empty="yes" name_divider="|" count_order="DESC" author_avatar_linked="yes" show_authors="yes" author_avatar="300"]
Simple GDPR Cookie Compliance #back to top
Simple GDPR Cookie Compliance is a simple notifier to inform users that your site uses of cookies and show your complies with EU GDPR cookie law and CCPA regulations.
Note: Installing this plugin alone does not make your site GDPR compliant. Since each site uses different cookies, you may need to ensure you have necessary configurations in place.
Now, let's start to configure it as it will display the default style and we want to make it fit with the theme style. First, you'll need to install the plugin “Simple GDPR Cookie Compliance".
- Install and activate the plugin "Simple GDPR Cookie Compliance".
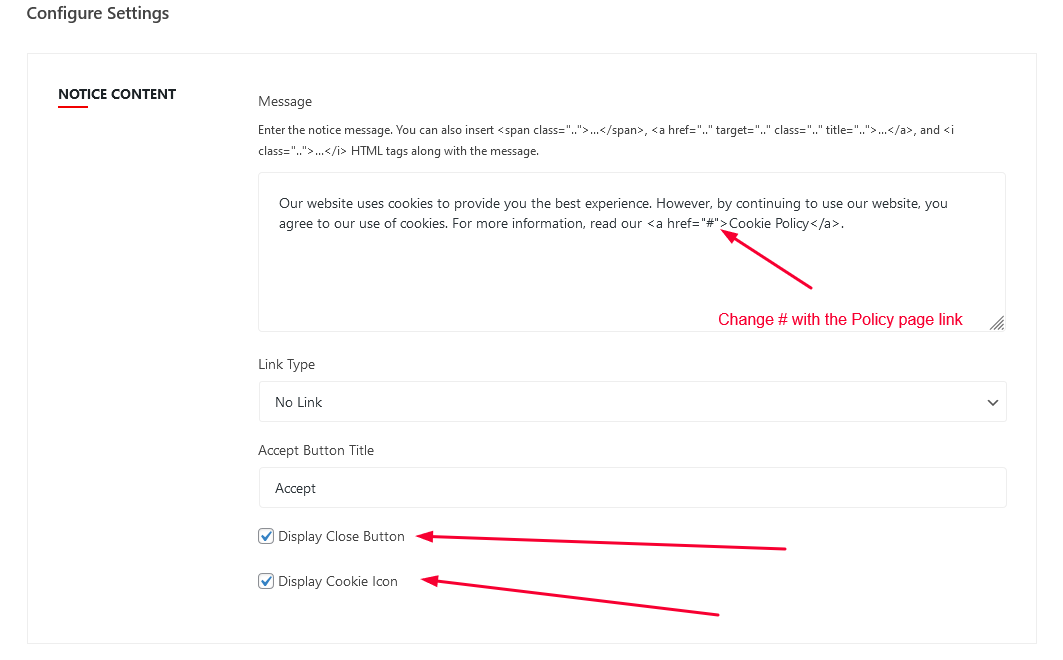
- Go to WordPress Dashboard, and scroll to the bottom and you'll see "Simple GDPR", click it.
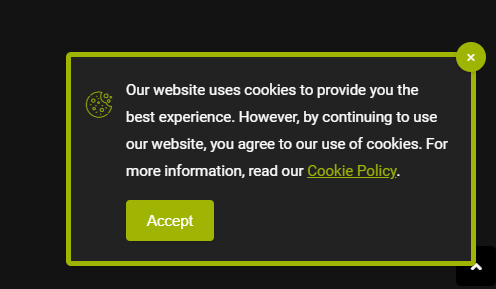
- Now, at the top, you'll see the "Notice Content" Box, and add the settings as per the screenshot by checking both boxes to display the Close button and Cookie Icon:
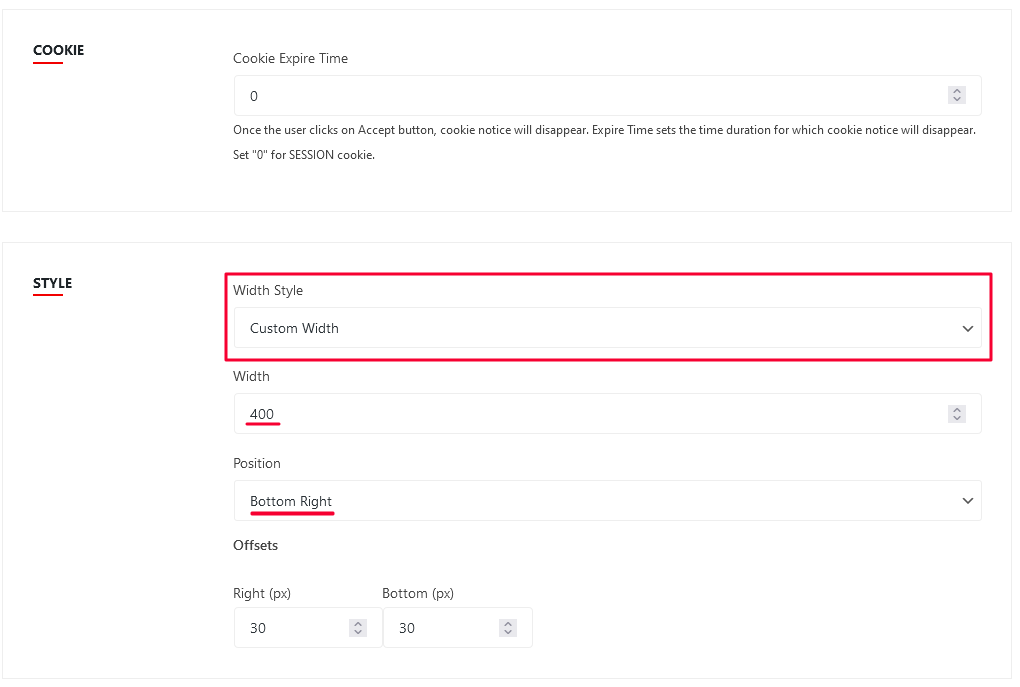
- The 2nd Box is the Style of the Cookie Compliance. For the demo, I select the Custom Width (400) and the position "Bottom Right", but you are free to configure it the way that better fits your needs. Please take a look at the screenshot:
- And the 3rd box and the most important, the "Colors", take a look at the screenshot:

Notice Color:
Background: #222222
Cookie Icon: #a0b403
Text: #FFFFFF
Link: #a0b403
Link - On Hover: #727e02
Close Button Color:
Background: On Hover: #a0b403
Background - On Hover: #727e02
Text/Text on Hover: #FFFFFF
Accept Button Color:
Background: #a0b403
Background On Hover: #727e02
Border: #a0b403
Border - On Hover: #727e02
Text/Text on Hover: #FFFFFF
- Custom CSS, add the code from below to the Custom CSS section, take a look at the screenshot:
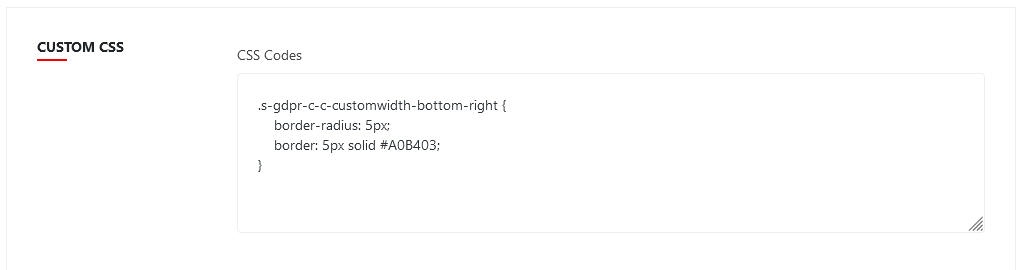
.s-gdpr-c-c-customwidth-bottom-right {
    border-radius: 5px;
    border: 5px solid #A0B403;
}
DCO Comment Attachment#back to top
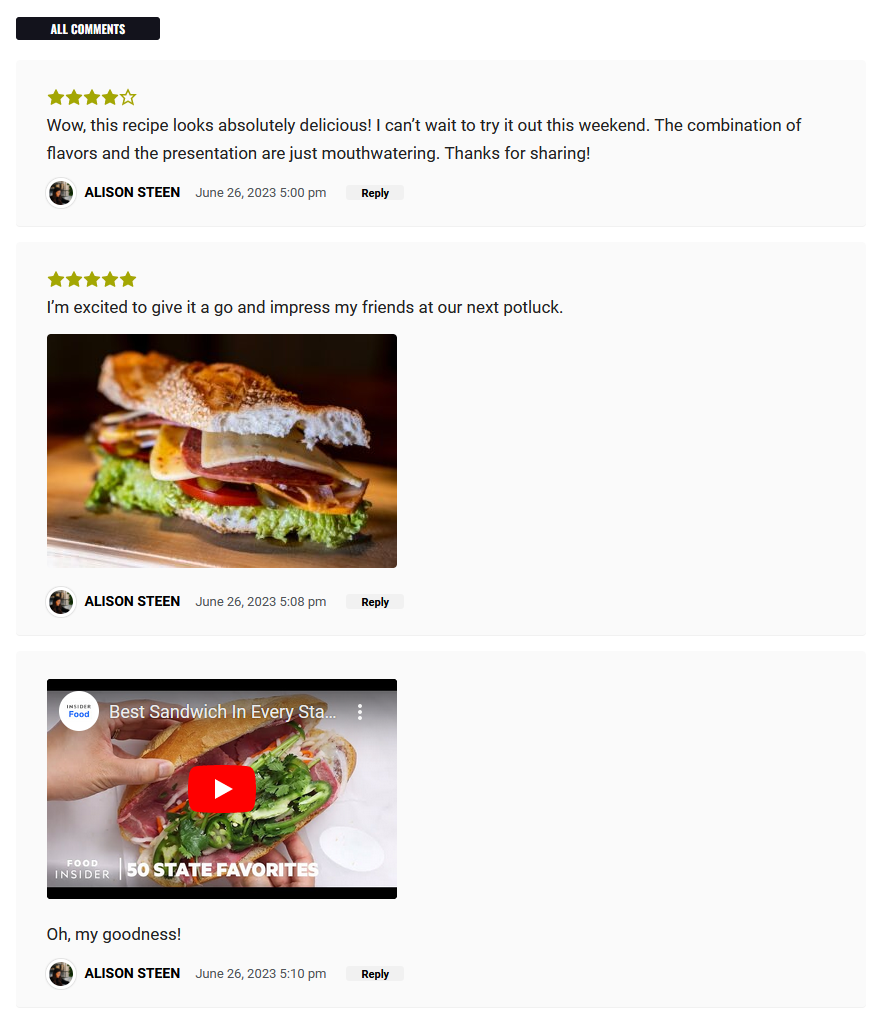
DCO Comment Attachment allows your visitors to attach images, videos, audios, documents, and other files with their comments. They will also be able to automatically embed links from Youtube, Facebook, Twitter, and other services in the comment text.
- Install and activate the DCO Comment Attachment plugin.
- Go to Dashboard > Plugins
- Add new and in the search box, write “DCO Comment Attachment” and click “Search Plugin”. Now click and install the first plugin “DCO Comment Attachment” by Denis Yanchevskiy.
- Go to Dashboard -> Plugins and active the plugin.
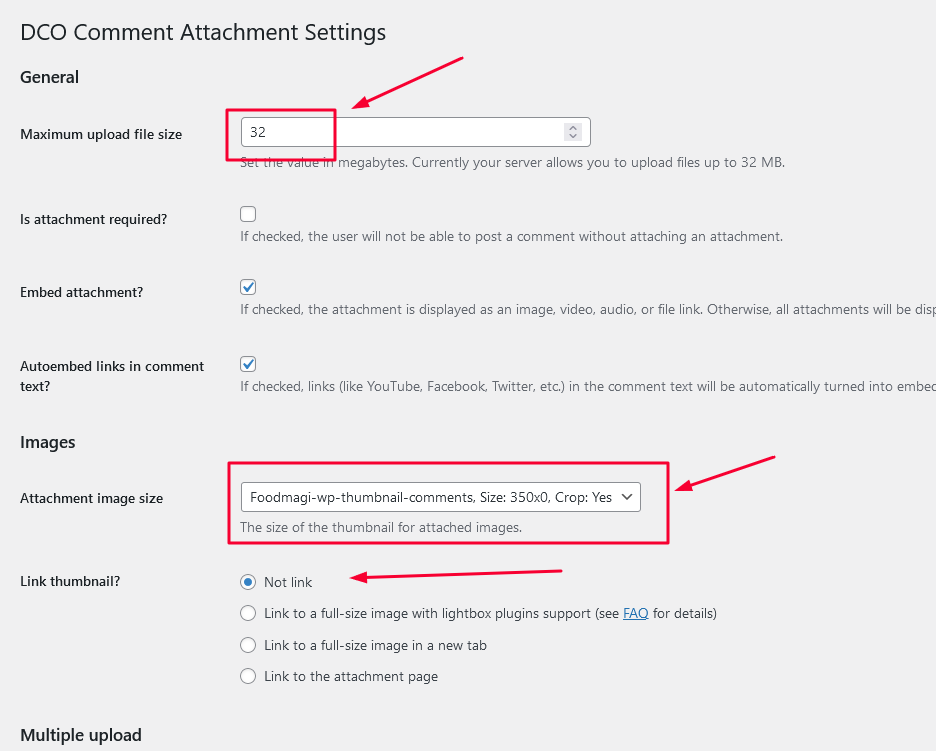
- Go to Dashboard -> Settings -> DCO Comment Attachment Settings, and from “Attachment image size” choose “Foodmagi-wp-thumbnail-comments, Size: 350×0, Crop: Yes” and from “Maximum upload file size” change the maximum upload file size as per screenshot:
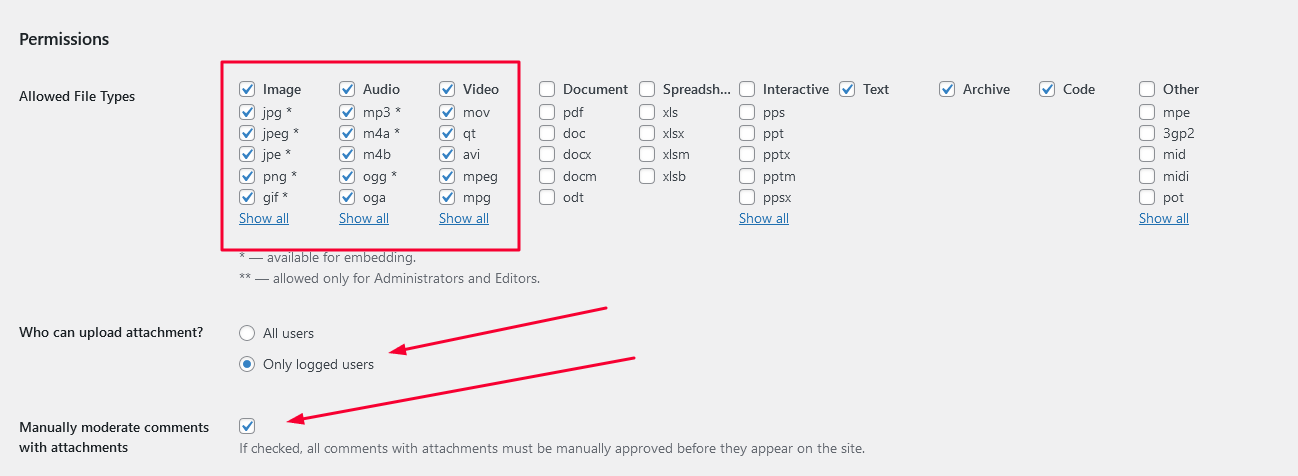
- From the Permissions section, select only the allowed file types as per the screenshot:
WP Recipe Maker #back to top
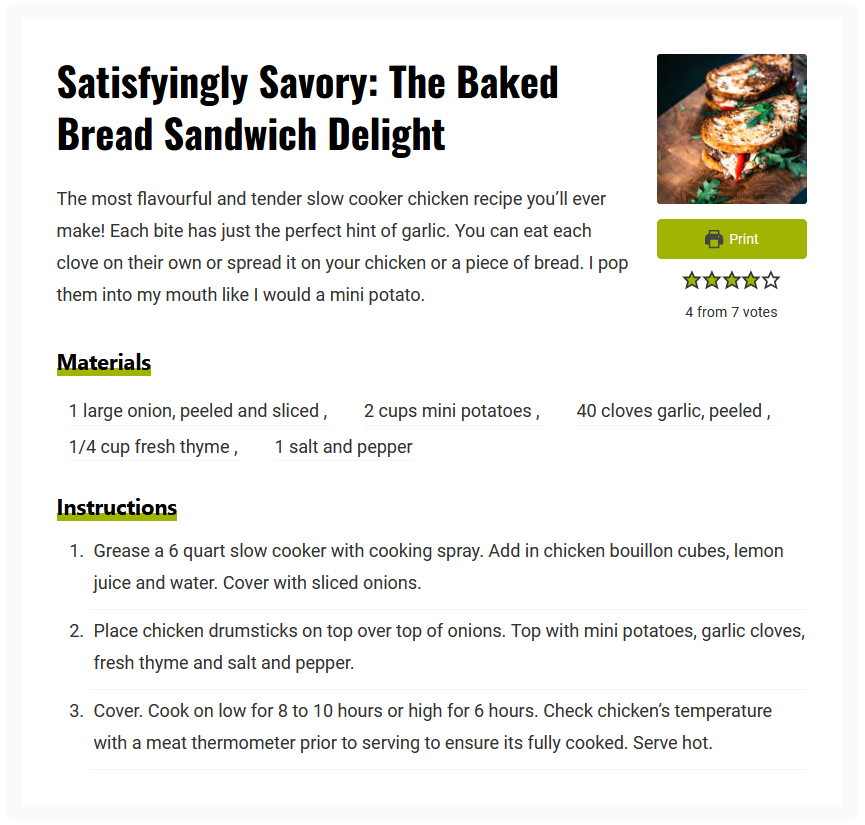
WP Recipe Maker is the easy recipe plugin that everyone can use. An easy workflow allows you to add recipes to any post or page with automatic JSON-LD metadata for your recipes. This recipe metadata will improve your SEO and get you more visitors. The Settings used in the demo:
- After you’ve installed the plugin, go to WordPress Dashboard > WP Recipe Maker > Settings:
- WP Recipe Maker > Settings > Recipe Template and selected “Compat Howto” and that’s it:
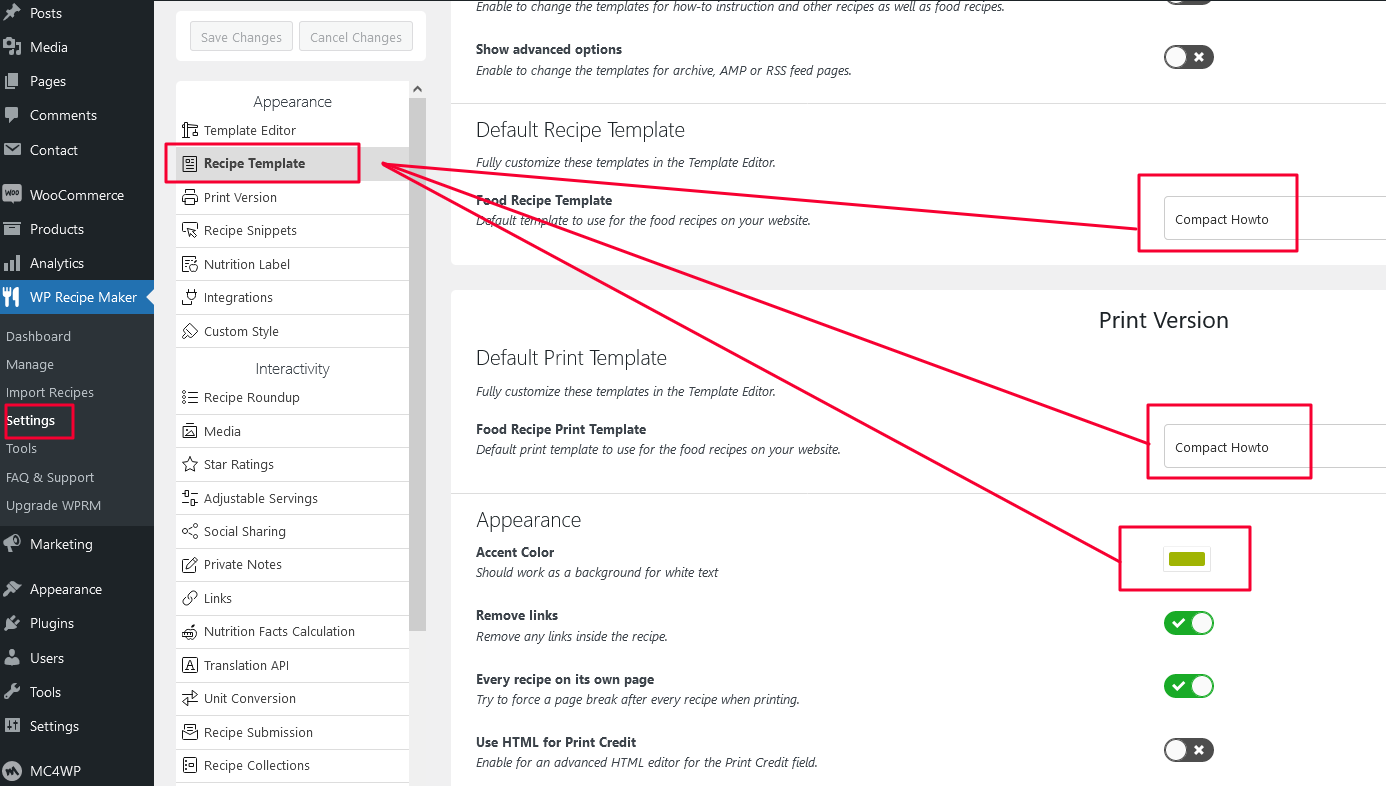
For the Accent Color, use the main color: #A0B403 - Take a look at the video tutorial to understand how simple is to add a recipe to a post https://www.youtube.com/watch?v=AtvGLRtTQgg
- WP Recipe Maker > Settings > Star Ratings
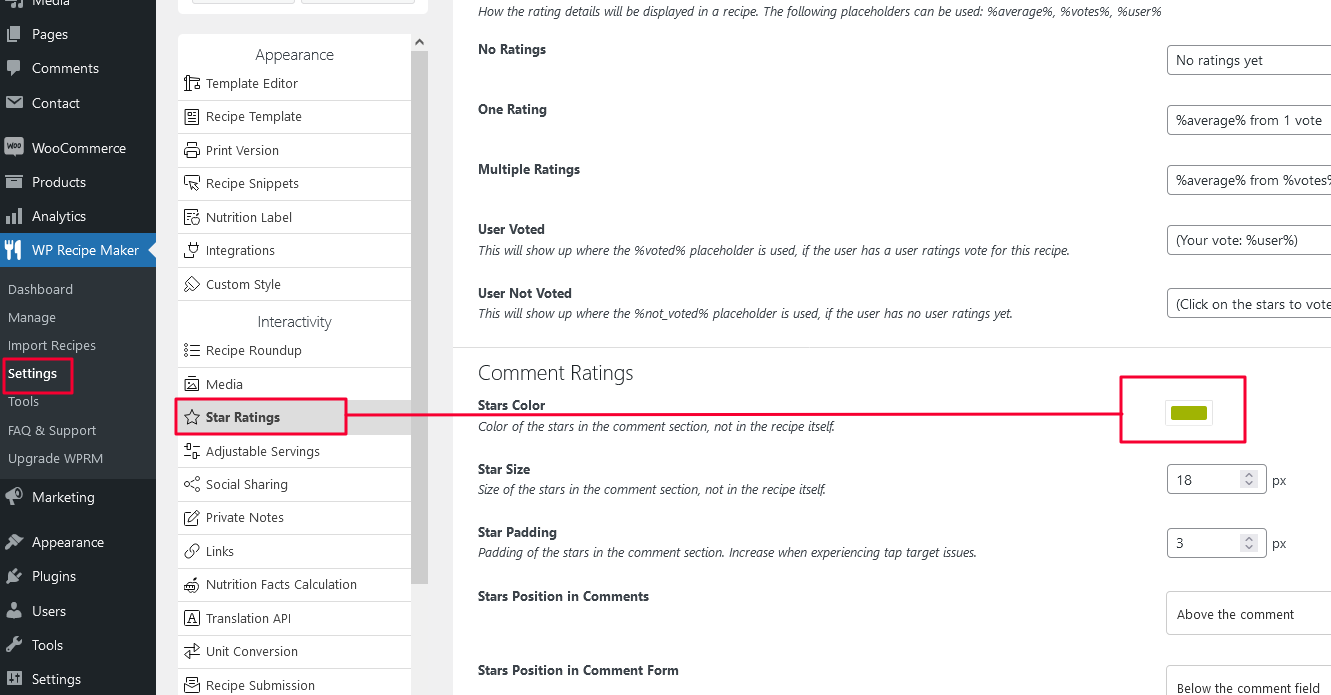
For the Stars Color, use the main color: #A0B403
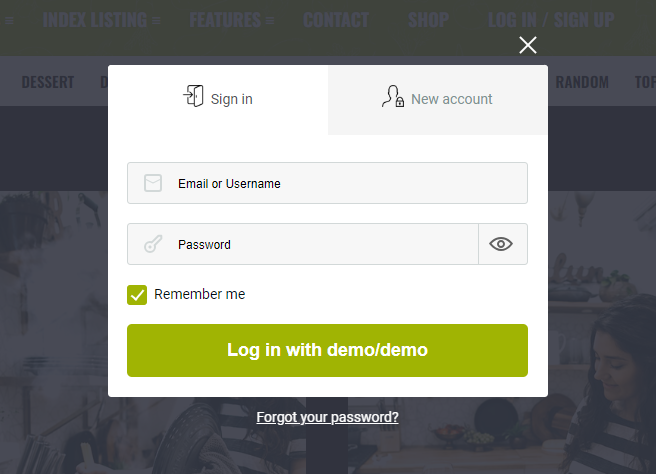
AJAX Login and Registration modal popup #back to top
AJAX Login and Registration modal popup
- First navigate to Plugins > Installed Plugins > Click Add New
- Search for "AJAX Login and Registration modal popup + inline form" the first plugin and click "Install Now".
- The link of the plugin: https://wordpress.org/plugins/ajax-login-and-registration-modal-popup/
Add login/register modal to your menu
- Create a custom menu with any label, for example Login as per screenshot:
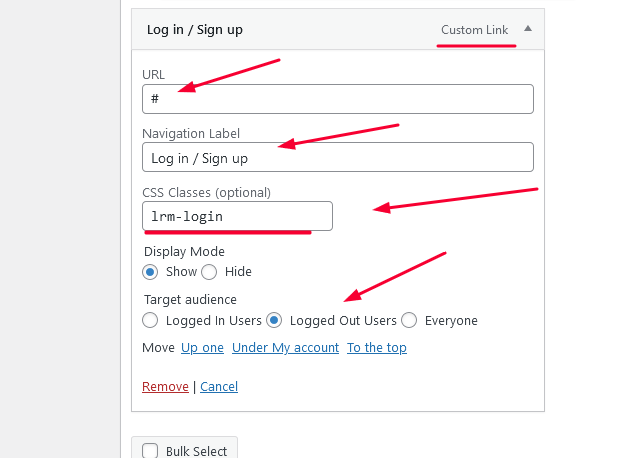
- Make sure to add # to your text, for example #login #account #etc
- Make sure to add the CSS Classes "lrm-login" and that's it, save your menu.
Configure login/register plugin:
- Go to Settings > Login/Register Modal > Actions/Redirects:
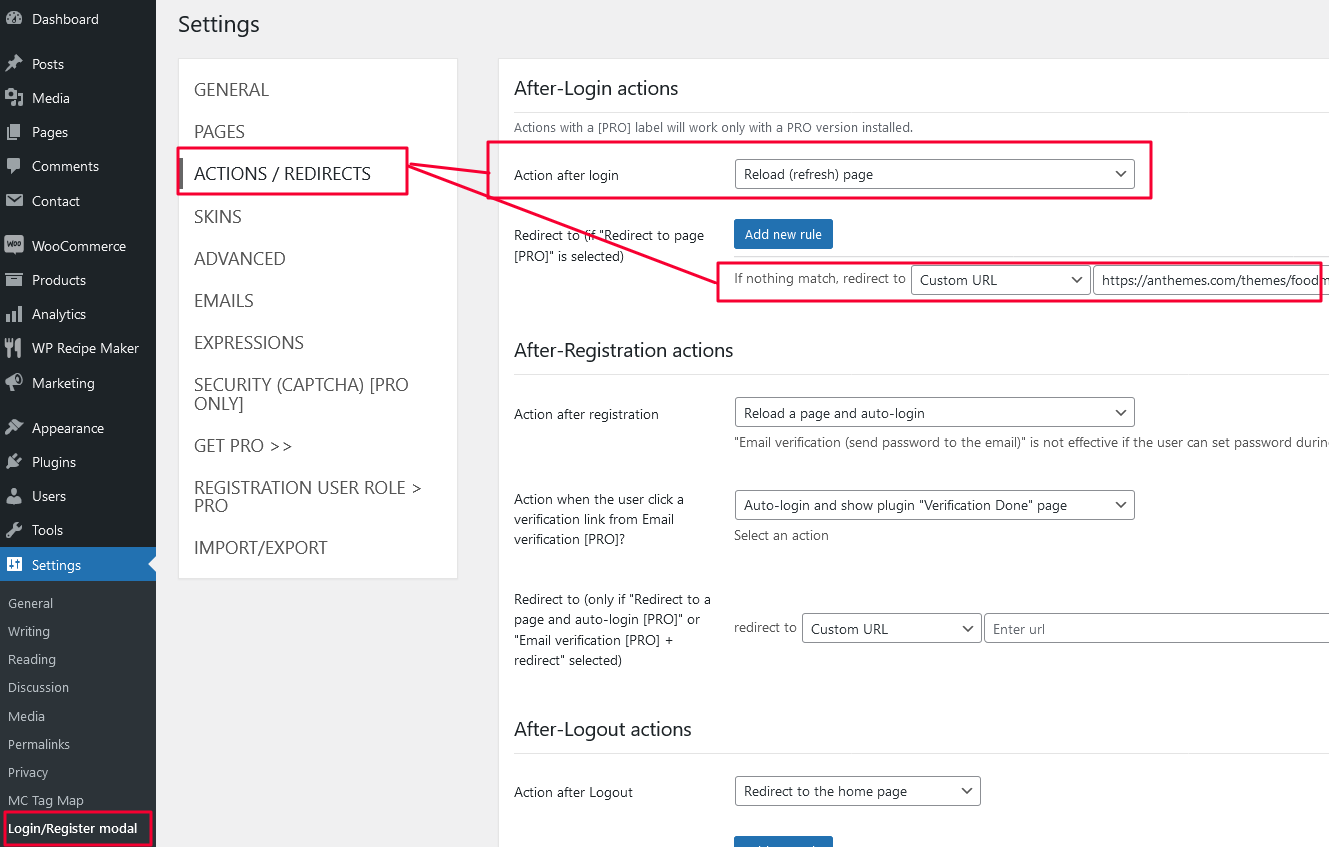
I'm using the free version on the demo, and it depends on the new updates made by the plugin author, this option can be free or premium, in order to Redirect to a page you choose. The one that will work and it will be Free, is the "Reload (refresh) page" and this is what we need. - Via Settings > Expressions, you can change the default words.
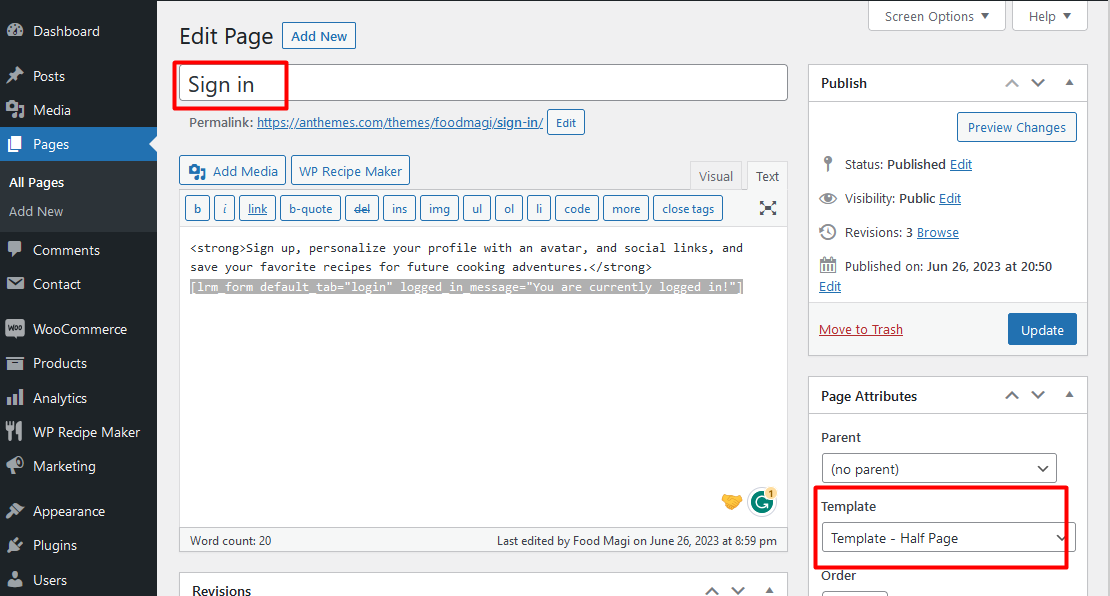
Sign in page:
- Go to Dashboard > Pages > Add New:
- Name it "Sign in" or whatever and from the right on Page Attributes choose "Template - Half Page" and add this shortcode:
[lrm_form default_tab="login" logged_in_message="You are currently logged in!"]
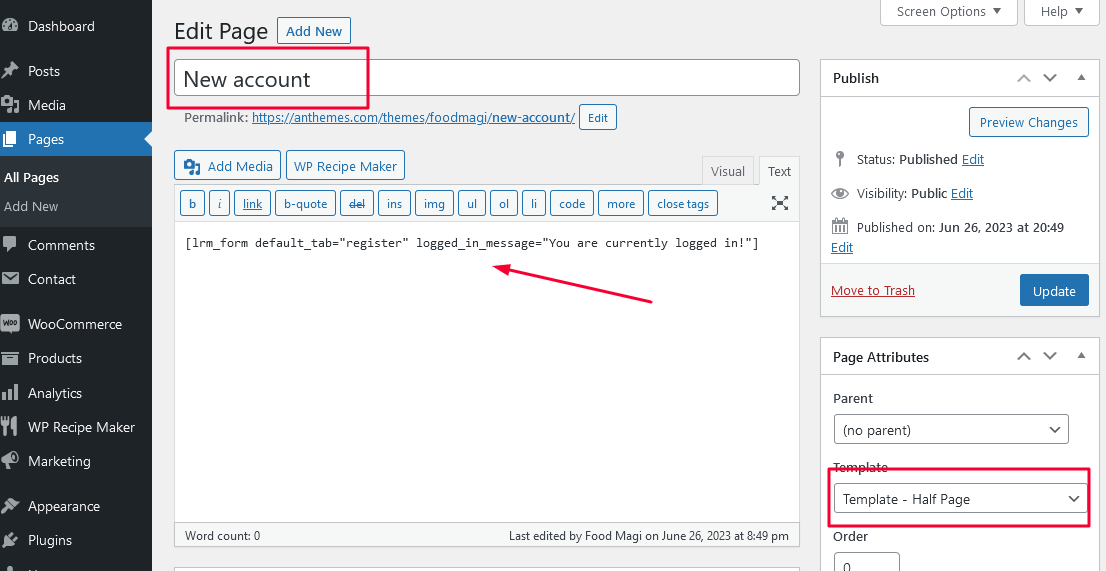
New account page:
- Go to Dashboard > Pages > Add New:
- Name it "New account" or whatever and from the right on Page Attributes choose "Template - Half Page" and add this shortcode:
[lrm_form default_tab="register" logged_in_message="You are currently logged in!"]
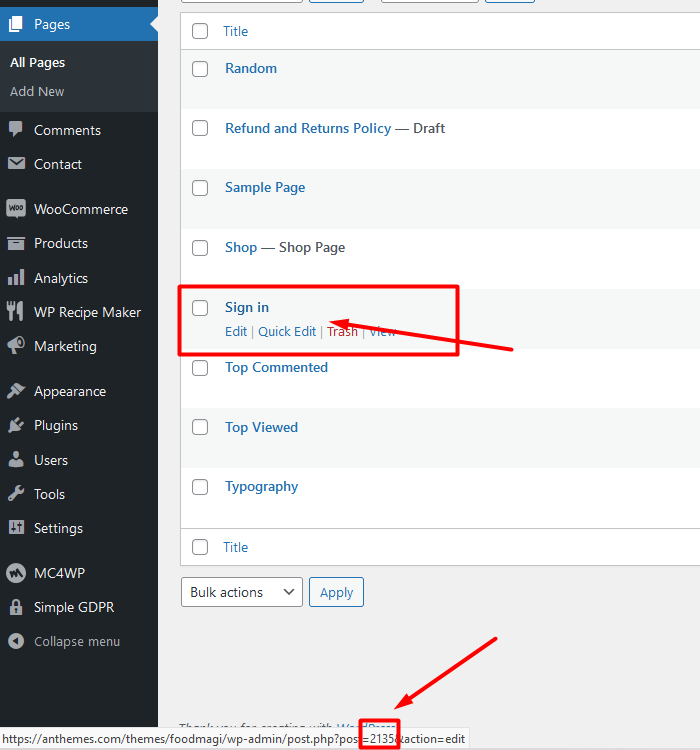
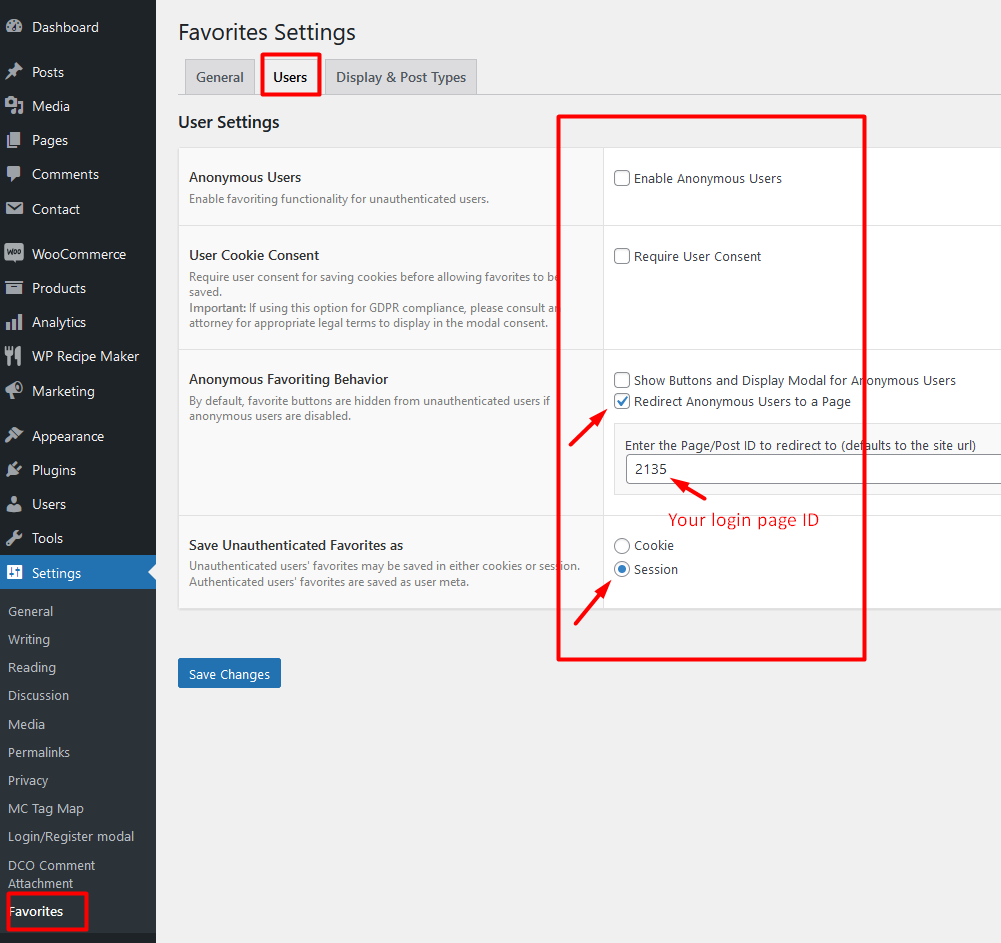
ID of a page:
- Go to Dashboard > Pages > Sing in
- Hover the Sing in page, and to the left you'll see the full link, and the number that you see in the link is the ID of that page. You'll need the ID for the configuration of the Favorites plugin.
Bookmarked / Favorites Posts #back to top
The plugin can provide a way to save favorites, likes, bookmarks, or any other similar types of data with its customizable button text.
Plugin Install:
- First navigate to Plugins > Installed Plugins > Click Add New
- Search for "Favorites" By Kyle Phillips, the first plugin and click "Install Now".
- The link of the plugin: https://wordpress.org/plugins/favorites/
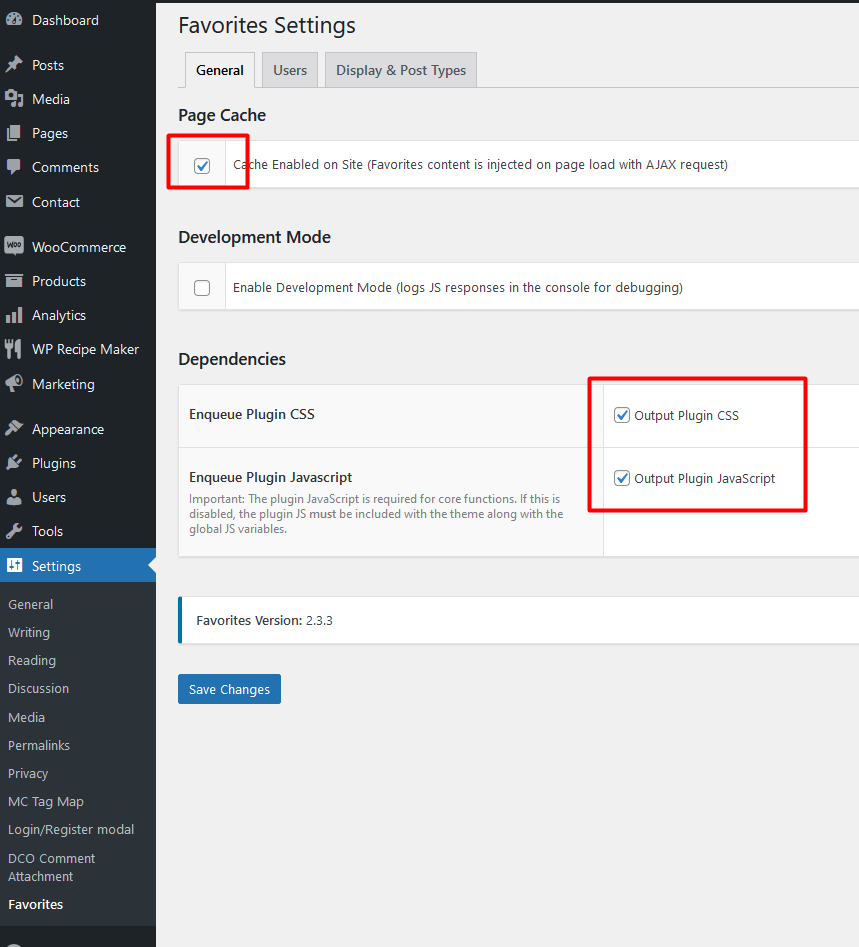
Favorites Settings:
- Settings > Favorites > General, and check the boxes as per the screenshot:
- Settings > Favorites > Users, and check the boxes as per the screenshot:
- Settings > Favorites > Display & Post Types, and check the boxes / select the options as per the screenshot:
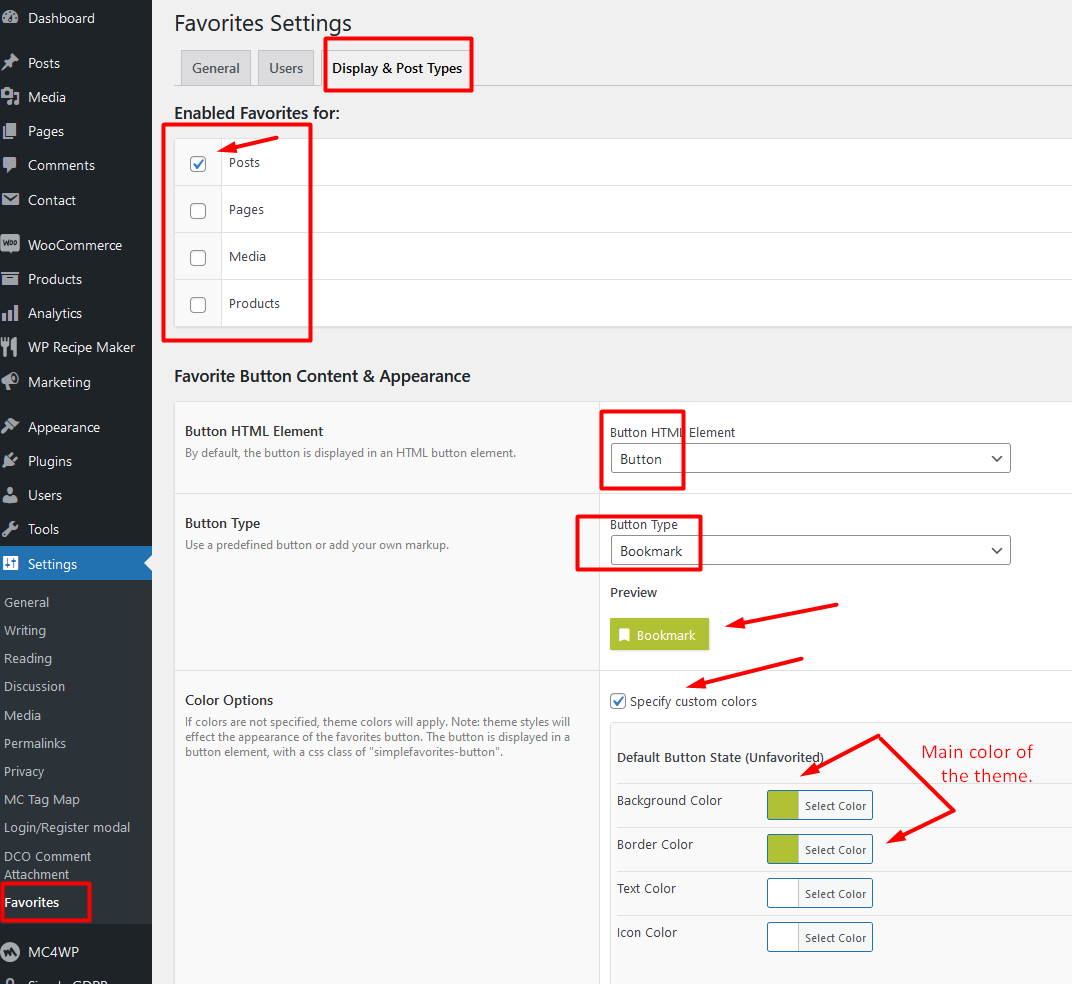
Background / Border Color: #A0B403
Text / Icon Color: #FFFFFF
- Settings > Favorites > Display & Post Types, and check the boxes / select the options as per the screenshot
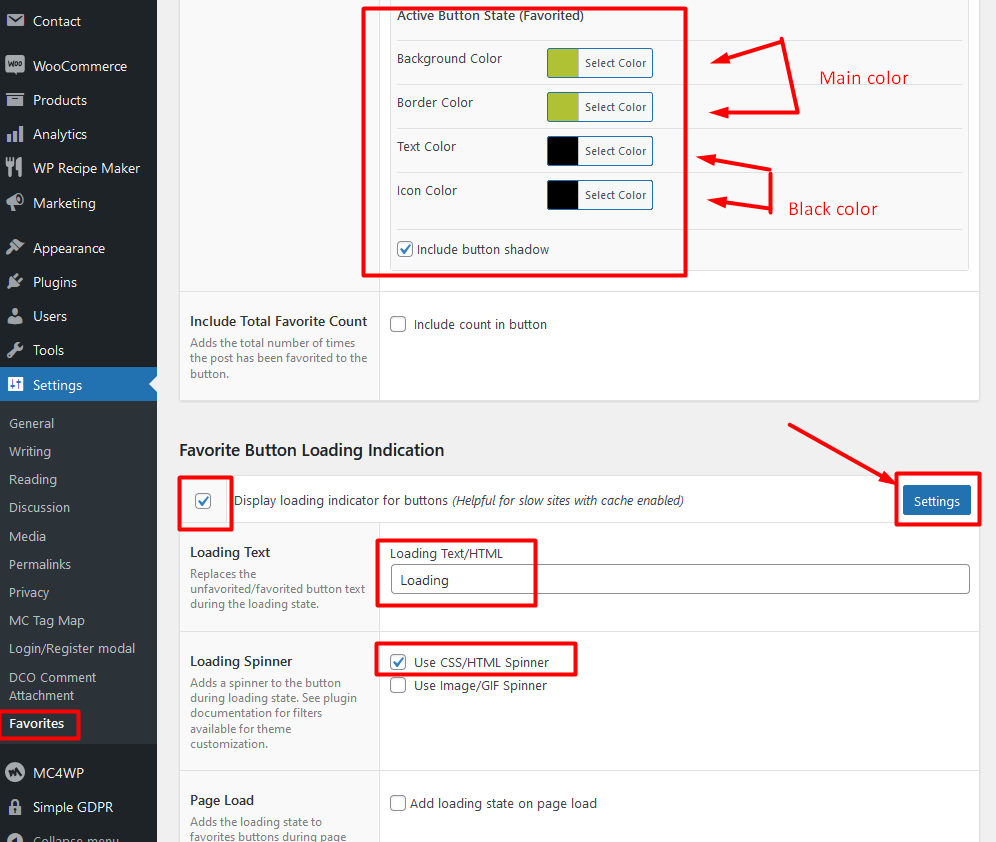
Background / Border Color: #A0B403
Text / Icon Color: #000000
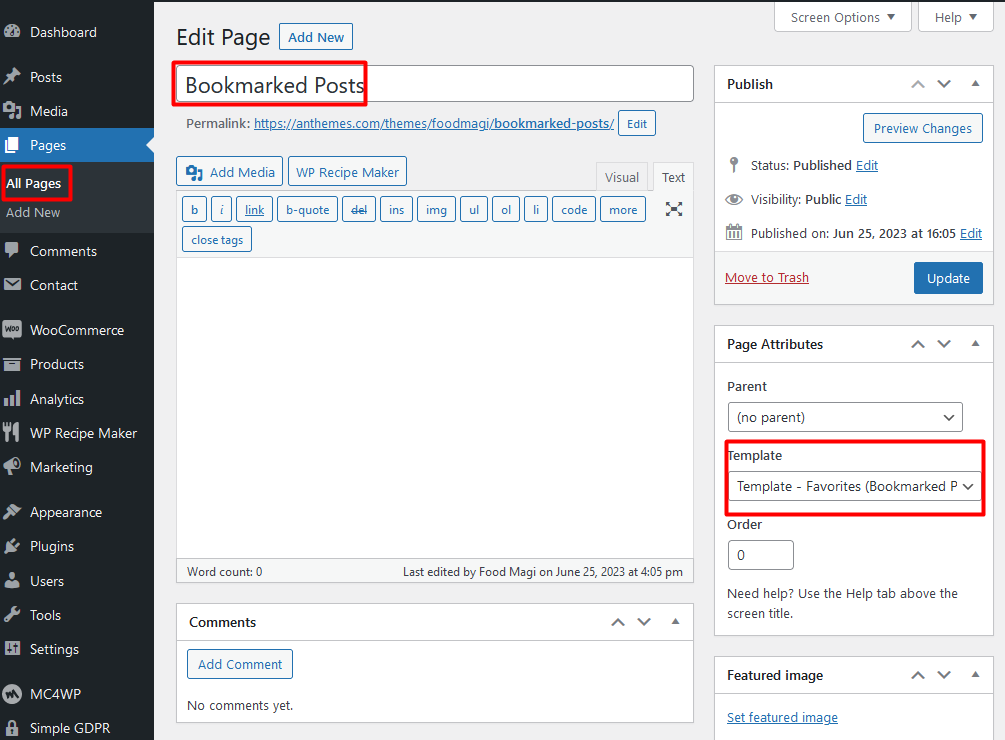
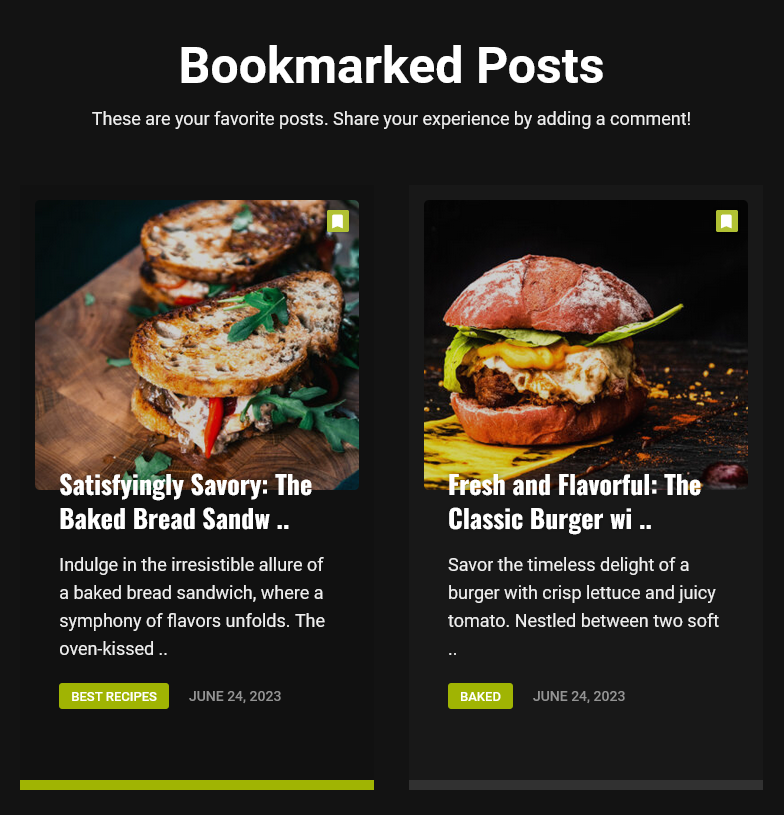
Bookmarked Posts Page:
- Go to Dashboard > Pages > Add New:
- Name it "Bookmarked Posts" or whatever and from the right on Page Attributes choose "Template - Favorites (Bookmarked Posts)"
WooCommerce #back to top
WooCommerce Configuration
Whether you’re launching a business, taking brick-and-mortar retail online, or developing sites for clients, use WooCommerce for a store that powerfully blends content and commerce. WooCommerce is the world’s most popular open-source eCommerce solution.
- Install and activate the WooCommerce plugin from here: https://wordpress.org/plugins/woocommerce/
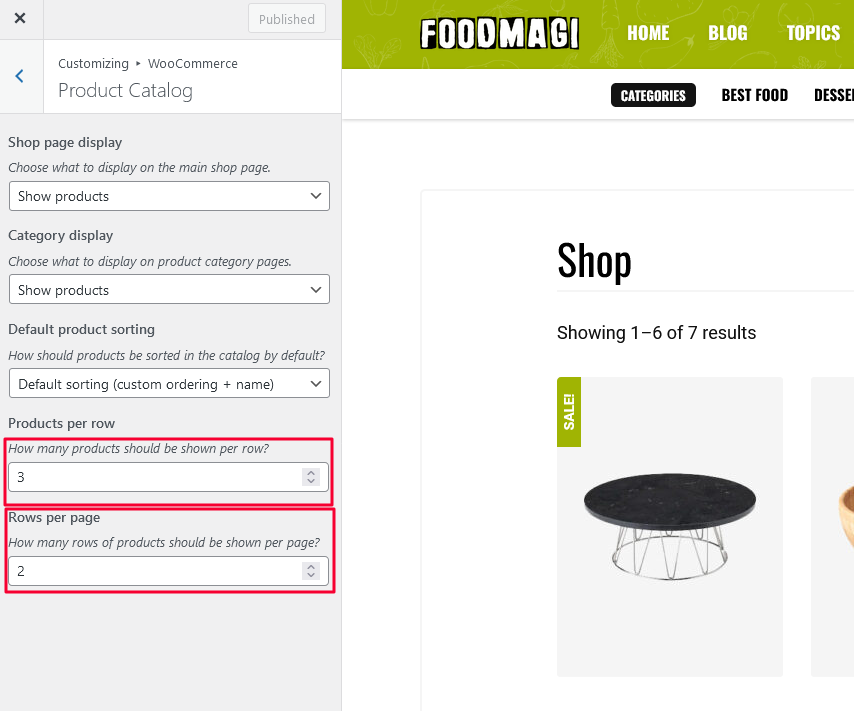
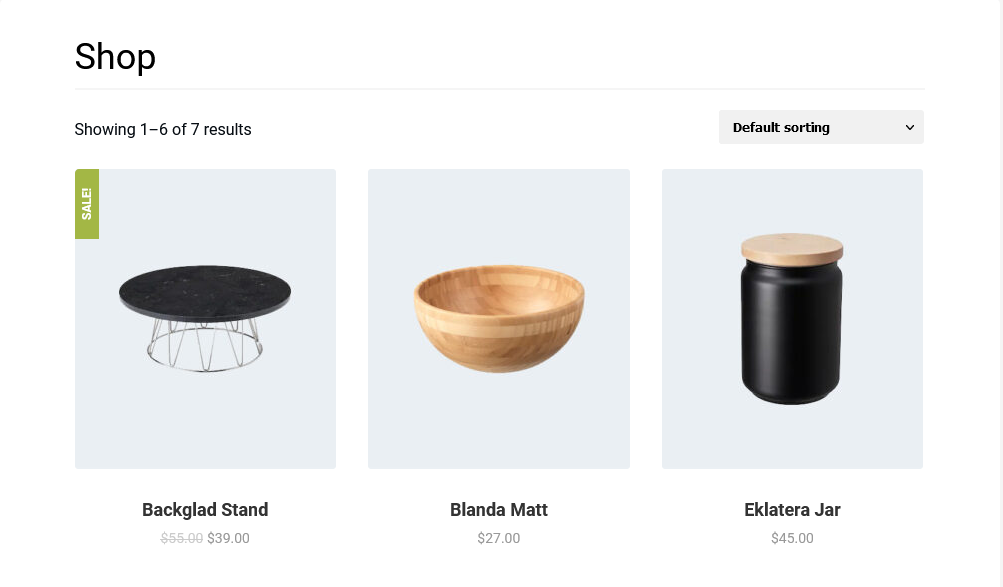
- Go to Appearance > Customize > WooCommerce > Product Catalog.
- Change "Products per row" with 3 and "Rows per page" with 2, as per screenshot and click "Publish".
Theme Options #back to top
For Theme Optons Settings: go To WordPress Dashboard > Appearance and click "Customize" and now you'll see "Theme Options" settings: 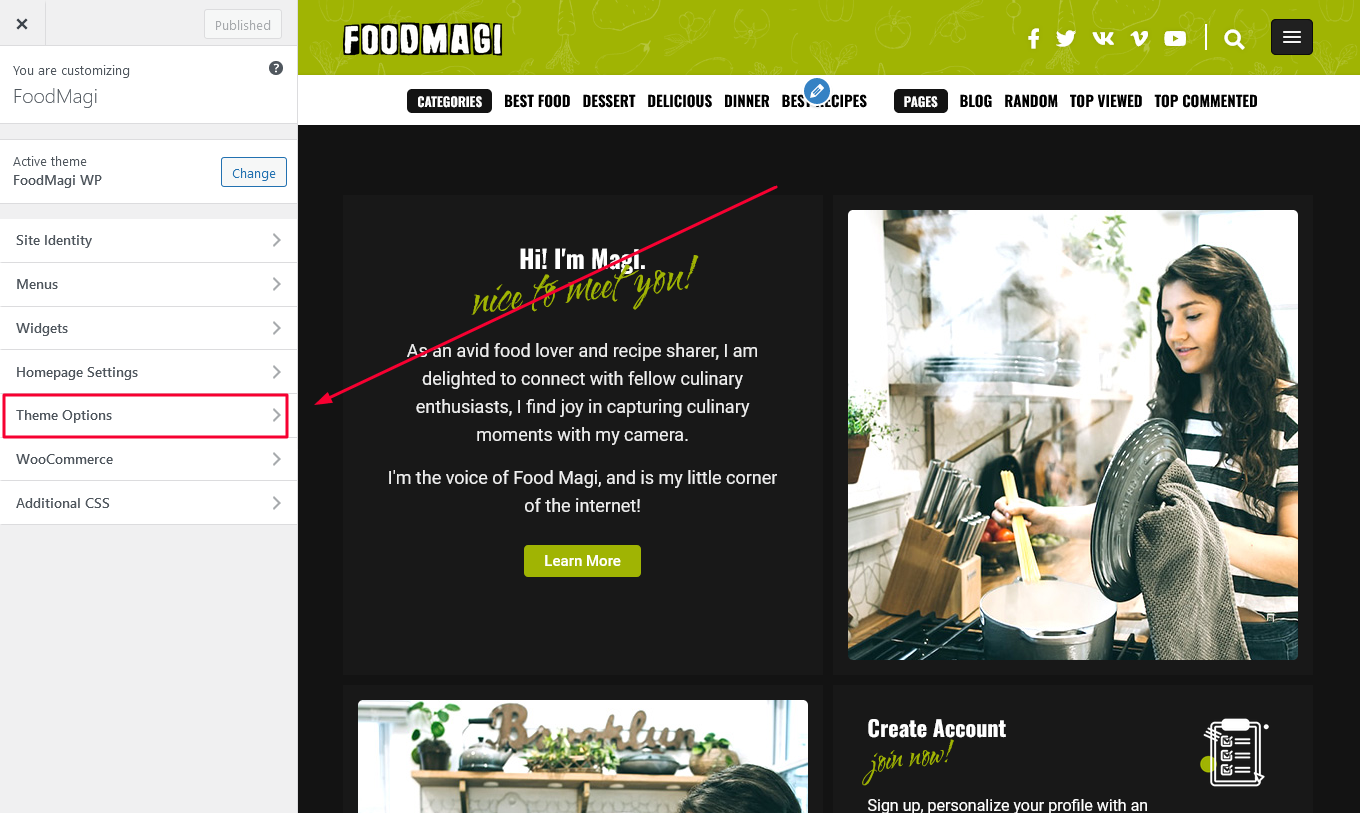
Updating a WordPress Theme from Themeforest #back to top
Option 1: The Beginners Option
Here’s the most simple way of updating your WordPress theme that’s purchased from ThemeForest::
- We need an easy way of overwriting the theme files, since WordPress doesn’t support this, we need a plugin, install this plugin: https://wordpress.org/plugins/easy-theme-and-plugin-upgrades/
- Go to the downloads page of your ThemeForest account here: http://themeforest.net/downloads
- Find the theme you’re updating from the list, click the big green “download” button once, and from the drop down menu choose “installable WordPress file only”

- Upload the downloaded zip file to your WordPress installation via “appearance” -> “themes” -> “add new”, just like you did when you first installed the theme.
- Thanks to the plugin mentioned in step 1, you’ll now get an “upgrade existing” option after uploading your theme, without the plugin you’d just get an error.
- There you go, you’ve updated the theme!
Option 2: The Automatic Option
Envato offer an automatic update solution for ThemeForest themes by using “Envato Toolkit”, see the full details of this here: http://www.wpexplorer.com/envato-wordpress-toolkit-guide/
Option 3: The FTP Upload (Advanced Users)
Another way to update your theme is via FTP, that is, you connect to your server and manually overwrite the theme folder. To do this grab the theme files mentioned from Option 1, with these in hand, unzip the file you have, you should have a folder just called THEMENAME (being the name of your theme)
Now the next step is simple, connect to your server via FTP (if you don’t know how to do this, use option 1) navigate to /wp-content/themes/, do not just overwrite the theme folder – here’s why. In previous updates to my themes, files have been deleted or relocated, if you just overwrite the folder then these files will remain, this can cause issues (especially with WooCommerce), here’s what you should do instead: Delete the THEMENAME folder that’s on your server, and then re-upload the new THEMENAME folder, this ensures that your new theme is 100% correct.
Translate Theme to another Language #back to top
How do I translate my theme to another language?
Our themes are written in English, though you are of course welcome to translate them to your language. While it's possible to go through each theme file and manually translate the appropriate text elements, we highly recommend using the program Poedit to translate your theme. It's easy and will save you LOTS of time.
- First, go to WP Dashboard > Settings > General > Site Language > Select your language > Save.
- Then, download & install the Poedit program.
- Open Poedit and click the "Open" button on the top-left of the program screen. Within your theme's files, find the "languages" folder and select the "foodmagi-wp.POT" file.
- A long list of text elements you may translate will appear in the box labeled "Source Text". Please note: You may not need to translate all of these elements. Many may be WordPress notification messages or similar.
- Select the line within the "Source Text" box that you'd like to translate. When that line is highlighted, go down to the box labeled "Translation". Here, you can type the direct translation of the "Source Text" in whatever language you'll be using. Repeat this step for all of the "Source Text" elements you wish to translate.
- When done, go to "File" and "Save as" within your theme's "languages" folder.
IMPORTANT! You must save this new file with a name based on a specific format: aa_AAThe first "aa" refers to ISO 639 two-letter language code (list found HERE).
The second "AA" refers to an ISO 3166 two-letter country code (list found HERE).
( Example 1 )
If translating to Danish, we would use the Danish language code of "da" and the Danish country code of "DK". The file name must be the language code in lowercase letters, followed by an underscore character, and lastly the language code in uppercase letters. So the finished file name would then be: da_DK
( Example 2 )
If translating to Brazilian Portuguese, your file name would be: pt_BRNote: For the French language in Canada, please use "fr_FR". "fr_CA" is not recognized by WordPress. - When you save the file, it will automatically create your .po format as well as an additional .mo format file of the same name.
- Via your FTP program, upload the .po & .mo files you just created to your theme's "languages" folder.
- You're finished!
Support Desk #back to top
Please remember you have purchased a very affordable theme and you have not paid for a full-time web design agency, so please be patient, polite and respectful.
Support for my items includes:- * Responding to questions or problems regarding the item and its features
- * Fixing bugs and reported issues
- * Providing updates to ensure compatibility with new software versions
- * Customization and installation services
- * Support for third party software and plug-ins
Support requests are being processed on business days Monday to Friday from 8:00 to 17:00 (GMT +2) within 24h in the order they were received:
Submit a support ticket My Portfolio
- * Make sure your question is a valid Theme Issue and not a customization request.
- * Make sure you have read through the documentation and any related video guides before asking support on how to accomplish a task.
- * Try disabling any active plugins to make sure there isn't a conflict with a plugin. And if there is this way you can let us know.
- * If you have customized your theme and now have an issue, back-track to make sure you didn't make a mistake or make a clean install of the theme.
- * Almost 80% of the time we find that the solution to people's issues can be solved with a simple "Google Search". You might want to try that before seeking support. You might be able to fix the issue yourself much quicker than we can respond to your request.
- * Make sure to state the name of the theme you are having issues with, when requesting support via ThemeForest.